Wednesday, March 31

A Girls Best Friend


Tube of choice,I am using PinUpToons,which you can purchase here,do not use unless you have a license to do so.

Scrapkit is A Girls Best Friend by Von at Soaring Hawks Nest here and you can purchase it here. I just love this kit Von,thank you!!

Template of choice,I am using template 217 by Missy at Divine Intentionz here.

Font of choice,I am using Amanda here.
-This tutorial was written assuming you have working knowledge of PSP-

Dropshadow for tut:
Vertical 2
Horizonal 2
Opacity 36
Blur 6

Open template/hit shiftD to duplicate/close the orginal/delete credit layer.

We will start with top layers first/highlight and click on rectangle 3 layer with your magicwand/paste paper 4 as a new layer/selections/invert/delete/deselect/delete rectangle 3 layer.

Repeat on rectangle 1&2 layers using paper 3.

Right click on what is now raster 1 layer/merge/merge down to raster 3/right click on merged layers/arrange/move down below rectangle layer/resize larger by 10%/dropshadow/we will position later.

Highlight rectangle layer/selections/select all/float/defloat/paste paper 6 as a new layer/resize 20%/position/selections/invert/delete/do not deselect.

Paste tube/position/delete/deselect/dropshadow.

Right click on tube layer/merge/merge down to rectangle layer/dropshadow.

Highlight circle layer/selections/select all/float/defloat/paste paper 1 as a new layer/selections/invert/delete/do not deselect/paste dog house/resize 50%/position/delete/deselect.

Paste dog/resize 50%/position/apply dropshadow to dog house and dog/right click on dog/merge/merge down to circle layer/dropshadow.

Highlight dotted circle/selections/float/defloat/activate paper 4/edit/copy/edit/paste into selection/deselect/right click on dotted layer/merge/merge down to circle layer/resize 30%/position all layers where desired.

Highlight rectangle layer/paste frame 1/resize 30%/using pick tool postion frame and right click/arrange/move down/dropshadow.

Paste beaded string 1/resize 25%/position/dropshadow.

Paste flower 1/resize 50%/edit/repeat resize/layers/duplicate/position both layers/dropshadow.

Repeat with dog bone.

Repeat with dragonfly 2.

Add copyrights.

Add name.

Layers/merge/merge visible.

Resize all layers 12%.

Save.
Hope you enjoyed my tut,would love to see your results and add it to my gallery :)

Email me here

Hugs,Mary

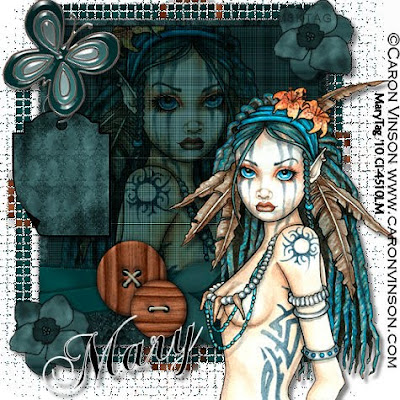
Tribal Passion


Tube of choice,I am using Caron Vinson,which you can purchase here,do not use unless you have a license to do so.

Scrapkit is Teal Passion,a freebie from Ziggyfan Scraps here. Thank you Amy for sharing this awesome kit!

Font of choice,I am using Chopin Script here.
-This tutorial was written assuming you have working knowledge of PSP-
Open a new 500x500 white image/paste polaroid frame 1 as a new layer/click inside frame with your magicwand/selections/modify/expand by 5.

Paste paper 6 below frame layer/selections/invert/delete/do not deselect.

Paste tube/position/delete/deselect/right click on tube layer/properties/blend mode/soft light.

Hide white background layer/layers/merge/merge visible/dropshadow of choice(use this dropshadow for tut)/unhide layer.

Paste ribbons below merged layers/resize 50%/layers/duplicate 3 times/position around frame/right click on copy 3 of raster 3/merge/merge down to raster 3/effects/texture effects/mosaic-antique/factory default settings.

Activate tag/using your selection tool or freehand selection tool/section it out(draw around to where you see the dancing lines around the tag)/edit/copy/active your working canvas/paste/ resize 50%/position/dropshadow.

Paste glass charm/resize 50%/position/dropshadow.

Paste flower/resize 50%/edit/repeat resize/layers/duplicate/position both layers/dropshadow.

Paste tube/position/dropshadow.

Add copyrights.

Add name.

Layers/merge/merge visible.

Resize all layers 5%.

Save.
Hope you enjoyed my tut,would love to see your results and add it to my gallery :)

Email me here

Hugs,Mary

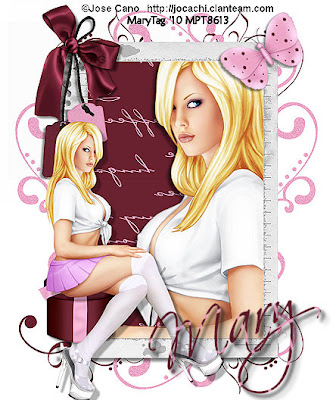
Flirty


Tube/close up of choice,I am using Jose Cano,which you can purchase here,do not use unless you have a license to do so.

Scrapkit is Flirty,a freebie from Bea at Bea's Creations here. Thank you Bea for the awesome freebie!

Script font of choice.
-This tutorial was written assuming you have working knowledge of PSP-

Open a new 500x600 white image.

Paste frame 4 as a new layer/image/free roatate to the right 90 degrees/click inside frame 2 with your magicwand/selections/modify/expand by 6.

Paste paper 8 below frame layer/selections/invert/delete/do not deselect.

Paste close up/position/delete/deselect/dropshadow:

Vertical 5
Horizonal 5
Opacity 50
Blur 6

Hide white background layer/layers/merge/merge visible/same dropshadow/unhide layer.

Paste doodle 1 below merges layers/resize 30%/position with pick tool/layers/duplicate 3 times/position all layers.

Paste doodle 2/layers/duplicate 3 times/position.

Paste tag 1/resize 50%/position/dropshadow:

Vertical 3
Horizonal 3
Opacity 46
Blur 4

Repeat with bow 5.

Repeat with box.

Repeat with butterfly 1.

Paste tube/resize if desired/position/dropshadow:

Vertical 7
Horizonal 7
Opacity 30
Blur 3

Add copyrights.

Add name.

Layers/merge/merge visible.

Resize all layers 12%.

Save.
Hope you enjoyed my tut,would love to see your results and add it to my gallery :)

Email me here

Hugs,Mary

Tuesday, March 30

Day In The Meadow


Tube of choice,I am using Caron Vinson,which you can purchase here,do not use unless you have a license to do so.

Scrapkit is Day In The Meadow by Kristi at Scrapin Divaz here and you can purchase it here. Gorgeous kit Kristi,thank you!

Font of choice,I am using Please Show Me Love here.
-This tutorial was written assuming you have working knowledge of PSP-


Dropshadow for tut:
Vertical 4
Horizonal 4
Opacity 42
Blur 8

Open a new 700x600 white image.

Paste frame 2 as a new layer/resize 25%/image/resize all layers 25%.

Click inside frame with your magicwand/selections/modify/expand by 6.

Paste paper 1 below frame layer/selections/invert/delete/do not deselect.

Paste grassy hill/resize 30%/position/delete/do not deselect.

Paste fence/resize 30%/edit/repeat resize/position/delete/deselect/dropshadow to fence&hill layers.

Highlight white background layer/paste flower branch/resize 50%/edit/repeat resize/position towards top of frame/layers/duplicate 3 times/position around frame.

Paste bench/resize 40%/edit/repeat resize/position/same dropshadow.

Paste flower 6/resize 50%/edit/repeat resize/layers/duplicate 1 time/position/dropshadow to both layers.

Paste flower 2/resize 50%/layers/duplicate 2 times/position/dropshadow.

Paste bird 1/resize 50%/position/dropshadow.

Paste bunny/resize 50%/edit/repeat resize/position/dropshadow.

Repeat with butterfly 1 and butterfly 2.

Paste tube/resize if needed/position/dropshadow.

Add copyrights.

Add name.

Layers/merge/merge visible.

Resize all layers 5%.

Save.
Hope you enjoyed my tut,would love to see your results and add it to my gallery :)

Hugs,Mary

I Cure All


Tube of choice,I am using PinUpToons,which you can purchase here,do not use unless you have a license to do so.

Templates are by Von at Soaring Hawks Nest,her medical series which you can find on her blog here. And if you like these,check here for lots more awesome creations! Thank you Von for the awesome templates!!

Eye Candy 4000 here.

Mask of choice,I am using mask 159 from Insatiable Dreams here.

Font of choice,I am using Monotype Corsiva,came with my psp program.
-This tutorial was written assuming you have working knowledge of PSP-

Dropshadow of choice for tut.

Open a new 600x600 white image/resize all layers 12%.

Open mask,minimize.

Open tube.minimize.

Open templates,minimize.

Activate blank image/paste tube/position/dropshadow/minimize.

Activate syringe template/hit shiftD to duplicate/close orginal/delete credit layer.

Image/free rotate all layers to the right 90 degrees.

Highlight and click on tube layer(syringe) with your magicwand/flood fill color of choice,I am using #b61a1d/deselect.

Repeat on handle layer using black for color fill.

Repeat on needle layer using Eye Candy 4000/chrome.

Repeat same on raster 3 layer.

Layers/merge/merge visible/edit/copy/activate working canvas layer/edit/paste as a new layer/image/resize 30%/position/dropshadow.

 
Activate first aid template/hit shiftD to duplicate/close orginal/delete credit layer.

Highlight and click on handle layer with your magicwand/flood fill color of choice,I am using black/deselect.

Repeat with first aid kit layer using color of choice,I used white.

Repeat with cross layer/using color of choice,I used #c00000/words I left as is.
Layers/merge/merge visible/apply same dropshadow/edit/copy/maximize working canvas/edit/paste as new layer/resize 50%/position.

 
Activate pills template/hit shiftD to duplicate/close orginal/delete credit layer.
Highlight and click on raster 2 layer using your magicwand.

Flood fill color of choice,I used #d2cfa0/deselect/click on edge of pill with magicwand/flood fill white/deselect/fill in white on gray line going through pill.
Edit/copy/paste to working canvas/resize 50%/position/dropshadow.

Highlight raster 4 on pills template/edit/copy/paste to working canvas/image/free rotate to the left 90 degrees/make sure all layers is unchecked/selections/select all/float/defloat/color fill of choice,I am using #c00000 again/deselect/dropshadow/resize 5%/position.

Hide white background layer/layers/merge/merge visible/unhide layer/layers/new raster layer/right click on new layer/arrange/move down/flood fill with color of choice,I am using black/right click on layer/new mask layer/from image/select mask/ok/layers/merge/merge group.

Repeat using #c00000 or color of choice.

Add copyrights.

Add name.

Layers/merge/merge visible.

Resize all layers 10%.

Save.
Hope you enjoyed my tut,would love to see your results and add it to my gallery :)

Hugs,Mary

Monday, March 29

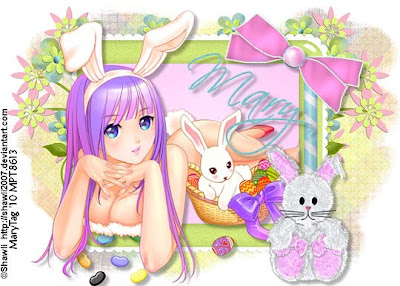
Easter Suprise


Tube of choice,I am using Shawli,which you can purchase here,do not use unless you have a license to do so.

Scrapkit is Easter Suprise by Bev at HorsePlays Pasture here. Thank you Bev for an awesome kit!!!

Mask of choice.

Font of choice,I am using Scriptina here.
-This tutorial was written assuming you have working knowledge of PSP-

Dropshadow of choice for tut.

Open mask,minimize.

Open a new 700x500 white image.

Paste frame 2 as a new layer/image/free rotate to the right 90 degrees/image/resize all layers 20%/click inside frame with your magicwand/selections/modify/expand by 6.

Paste paper 7 below frame layer/selections/invert/delete/deselect/right click on frame layer/merge/merge down to paper layer.

Highlight white background layer/paste paper 1/right click on paper layer/new mask layer/from image/select mask/layers/merge/merge group.

Paste flower doodle 3 below merged layers/resize 50%/position to the left of the tag/layers/duplicate/image/mirror.

Repeat with doodle flower 2.

Moving up top/paste tube/position/if using the same tube I am,erease any tube(foot)overlapping frame/dropshadow.

Paste bunny 3/resize 60%/position/dropshadow.

Paste candy stick 3/resize 50%/position/dropshadow.

Repeat with bow 3.

Paste jellybeans below tube layer/resize 50%/edit/repeat resize/position/dropshadow.

Add copyrights.

Add name.

Layers/merge/merge visible.

Resize all layers 4%.

Save.
Hope you enjoyed my tut,would love to see your results and add it to my gallery :)

Email me here

Hugs,Mary

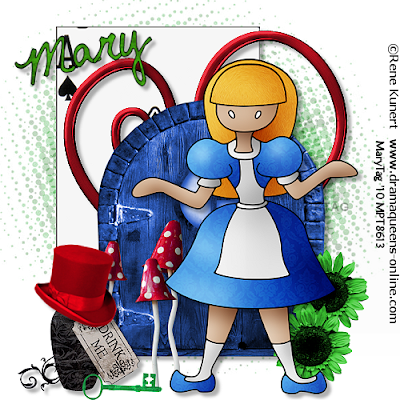
Mad Alice


Tube of choice,I am using Rene Kunert,which you can purchase here,do not use unless you have a license to do so.

Scrapkit is Mad Alice,a freebie by Stevie at Nightbirds Designs here. Thank you Stavie for an awesome kit!

Mask of choice,I am using circle mask 36 from Linda at Creative Misfits Creations here.

Font of choice,I am using Never Let Go here.
-This tutorial was written assuming you have working knowledge of PSP-

Dropshadow for tut:
Vertical 5
Horizonal 5
Opacity 31
Blur 5

Open a new 500x500 white image/paste heart 1 as a new layer/position/dropshadow.

Paste door/resize 20%/position/dropshadow.

Paste ace of spades below door layer/resize 15%/position/dropshadow.

Paste shrooms/resize 50%/position/dropshadow.

Paste drink me bottle/resize 50%/position/dropshadow.

Paste hatter/resize 50%/edit/repeat resize/position/dropshadow.

Repeat with key 2.

Paste flower 3/resize 50%/edit/repeat resize/layers/duplicate both layers/dropshadow.

Paste tube/resize if desired/position/dropshadow.

Hide white background layer/layers/merge/merge visible/unhide layer.
Paste paper 7 below merged layers/right click on paper layer/new mask layer/from image/select mask/layers/merge/merge group/layers/duplicate/position both layers.

Add copyrights.

Add name.

Layers/merge/merge visible.

Resize all layers if desired.

Save.
Hope you enjoyed my tut,would love to see your results and add it to my gallery :)

Email me here

Hugs,Mary

Sunday, March 28

Que Sera Sera

Photobucket
Tube of choice,I am using Steve Baier,which you can purchase here,do not use unless you have a license to do so.

Scrapkit is Que Sera Sera by Kristen at Mystical Illusionz here and you can purchase it here. Gorgeous kit Kristen,love the colors! Thank you!

Animation Shop

DSB Flux/bright noise

Font of choice,I am using Honey Script here.
-This tutorial was written assuming you have working knowledge of PSP-

Open a new 500x500 white image.

Paste window frame as a new layer/resize 20%/click in all squares with your magicwand/selections/modify/expand by 4.

Paste paper 15 below frame layer/selections/invert/delete/deselect.

Paste scalloped rose frame 5/resize 25%/click inside frame with your magicwand/selections/modify/expand by 5.

Paste paper 8 below rose frame/selections/invert/delete/deselect.

Highlight white background layer/paste flower 13/resize larger 60%/layers/duplicate/position both layers.

Paste glitter heart 1/resize 50%/position/dropshadow of choice(this is the dropshadow used for entire tut).

Paste tag 5/resize 55%/position/dropshadow.

Paste felt bow 3/resize 50%/layers/duplicate/position both layers/dropshadow.
Paste tube/position/dropshadow.

Add copyrights.

Add name.

Resize if desired.

Highlight glitter heart layer/selections/select all/float/defloat/layers/duplicate 2 times/rename layers h1,h2 and h3.

 
Highlight h1 layer/effects/dsb flux/bright noise/mixed checked at intensity at 20.

Repeat on h2 layer/intensity at 22.
Repeat on h3 layer/intensity at 24.

Highlight h1 layer/hide 2&3/edit/copy merged.

Take to AS and paste as a new animation.

Back to psp,hide h1,unhide and highlight h2/edit/copy merged/paste in AS after current frame/repeat with h3 layer.

Save as gif.
Hope you enjoyed my tut,would love to see your results and add it to my gallery :)

Hugs,Mary

Spring Dreams


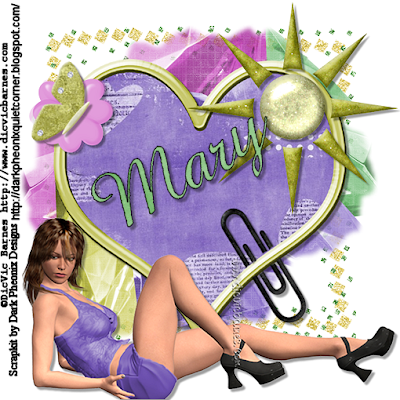
Scrapkit is Spring Dreams by Lacey at Dark Pheonix Designs here and you can purchase it here. Love this kit,the colors are awesome! Thank you Lacey!


Mask of choice,I am using Aquarebel 315's mask 23 here.

Font of choice,I am using Abbeyline here.

-This tutorial was written assuming you have working knowledge of PSP-

Dropshadow for tut:
Vertical 4
Horizonal 4
Opacity 38
Blur 3

Open mask,minimize.

Open a new 600x600 white image.

Paste element 17(heart frame)/resize 35%/click inside frame with your magicwand/selections/modify/expand by 5.

Paste paper 7 below frame layer/resize 15%/selections/invert/delete/deselect/right click on frame layer/merge/merge down to paper layer/resize 15%/dropshadow.

Paste element 13(gem)/resize 50%/position.

Repeat with elements 10,11 and 12/right click top gem layer/merge/merge down to first gem layer/right click/new mask layer/from image/select mask/ok/layers/merge/merge group/position.

Paste element 28(border)below mask layer/resize 40%/position.

Paste element 27(sun)/resize 60%/position/dropshadow.

Paste lement 26(paperclip)/resize 50%/edit/repeat resize/position/if over heart frame/use eraser tool to erase any over edge of frame/dropshadow.

Paste element 9(flower)/resize 60%/edit/repeat resize/position/dropshadow.
Repeat with element 3(butterfly).

Paste element 20(poser)/resize 30%/position/dropshadow.

Add copyrights.

Add name.

Layers/merge/merge visible.

Resize all layers 15%.

Save.
Hope you enjoyed my tut,would love to see your results and add it to my gallery :)

Hugs,Mary

Friday, March 26

Endless Love


Tube of choice,I am using Shawli,which you can purchase here,do not use unless you have a license to do so.

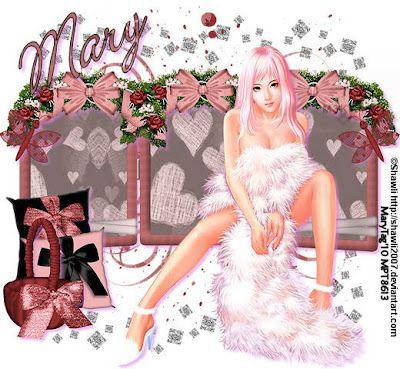
Scrapkit is Endless Love by Lisa at Aleahs Mommy Designs here and you can purchase it here. Thank you Lisa for letting me work with this stunning kit!!

Mask of choice,I am using love mask 3 from Rieka here.

Font of choice.
-This tutorial was written assuming you have working knowledge of PSP-

Dropshadow for tut/color #d881db :
Vertical 4
Horizonal 4
Opacity 54
Blur 5

Open mask,minimize.

 
Open element 53(frame)/hit shiftD to duplicate/close the orginal/image/canvas size/change to 650x600/layers/new raster layer/right click on new layer/arrange/move down/flood fill white.

Click inside frames/selections/modify/expand by 5.

Paste paper 37 below frame layer/selections/invert/delete/deselect/right click on frame layer/merge/merge down to paper layer/dropshadow.

Paste paper 4 below merged layers/right click on paper layer/new mask layer/from image/select mask/ok/layers/merge/merge group/resize 20%/position in center of frame/layers/duplicate/image/flip.

Paste element 58 below mask layers/resize 30%.

Paste element 5/resize 55%/layers/duplicate 2 times/position/dropshadow.

Paste element 33(butterfly)/resize 60%/layers/duplicate/position/dropshadow.
Paste element 4(basket)/resize 60%/position/dropshadow.

Repeat with elements 1&2(pillows)/position behind basket.

Paste tube/position/dropshadow.

Add copyrights.

Add name.

Layers/merge/merge visible.

Resize all layers 20%.

Save.
Hope you enjoyed my tut,would love to see your results and add it to my gallery :)

Hugs,Mary

Eggceptional Easter


Tube of choice,I am using Elias Chatzoudis,which you can purchase here,do not use unless you have a license to do so.

Scrapkit is Eggceptional Easter from Lis at PSPgirl Place here and you can purchase it here or here. This kit is awesome,packed full for all projects! Thank you Lis!

Mask of choice,I am using WSL mask 84 here.

Font of choice.
-This tutorial was written assuming you have working knowledge of PSP-

Open a new 600x600 white image.

Paste paper 12/layers/load save mask/load mask from disk/select mask/ok/layers/merge/merge group.

Paste element 37/resize 32%/click inside frame with your magicwand/selections/modify/expand by 5.

Paste paper 1 below frame layer/resize 30%/selections/invert/delete/do not deselect.

Paste tube/position/delete/deselect/dropshadow:

Vertical 4
Horizonal 4
Opacity 31
Blur 0

Right click on frame layer/merge/merge down to paper layer/resize 10%/apply same dropshadow.

Paste element 61 below merged layers/resize 8%/repeat with element 64.

Paste element 7/resize larger by 30%/position.

Paste element 71/resize 50%/position/dropshadow:

Vertical 3
Horizonal 3
Opacity 40
Blur 4

Paste element 47/resize 40%/edit/repeat resize/position/same dropshadow.

Repeat with elements 43&46.

Paste element 29/resize 60%/position/same dropshadow.

Repeat with element 2.

Paste element 9/resize 50%/edit/repeat resize/position/same dropshadow.

Add copyrights.

Add name.

Layers/merge/merge visible.

Resize all layers 17%.

Save.
Hope you enjoyed my tut,would love to see your results and add it to my gallery :)

Hugs,Mary

Thursday, March 25

Oh Darling

Image and video hosting by TinyPic

Tube of choice,I am using Steve Baier,which you can purchase here,do not use unless you have a license to do so.

Scrapkit is Little Darling by ZaZa at Scrap And Tubes here. Thank you for the awesome kit!!

Animation Shop

DCSpecial/Rain4 here.

Mask of choice,I am using circle mask 11 by Crystal at Creative Misfits Creations here.

Font of choice,I am using Odstemplik here.
-This tutorial was written assuming you have working knowledge of PSP-

Dropshadow for tut:
Vertical 5
Horizonal 5
Opacity 47
Blur 4

Open mask,minimize.

Open a new 600x600 white image.

Paste paper 3 as a new layer/right click/new mask layer/from image/select mask/ok/layers/merge/merge group.

Paste frame 1/resize 35%/click inside frame with your magicwand/selections/modify/expand by 5.

Paste paper 2 below frame layer/selections/invert/delete/paste tube/resize if needed/position/delete/deselect/highlight paper layer/adjust/hue and saturation/colorize/settings/bright red/hue 255 and saturation 151/ok/highlight tube layer/image/mirror/apply dropshadow/image/mirror.

Right click on frame layer/merge/merge down to paper layer/dropshadow.

Paste small hearts/resize 50%/layers/duplicate/position using your pick tool.

Paste flower/resize 50%/position/dropshadow.

Repeat with heart charm.

Add copyrights.

Add name.

Resize all layers 15%.

Highlight mask layer/layers/duplicate 2 times/rename layers r1,r2 and r3.

Highlight r1 layer/settings:

Rain 60
Wind 29
Angle 58
Scatter 9
Border to Center 50
Opacity 100
Random Seed 1
ok

Repeat to r2 layer changing random seed to 2 and r3 layer to random 3.

 
Highlight r1 layer/hide 2&3/edit/copy merged.

Take to AS and paste as a new animation.

Back to psp,hide r1,unhide and highlight r2/edit/copy merged/paste in AS after current frame/repeat with r3 layer.

Save as gif.

Save.
Hope you enjoyed my tut,would love to see your results and add it to my gallery :)

Hugs,Mary

Springtime Melody


Tube of choice,I am using PinUpToons,which you can purchase here,do not use unless you have a license to do so.

Scrapkit is Springtime Melody by Chris at Katelynns Designs here and you can purchase it here. Gorgeous kit Chris,thank you!

Mask of choice.

Font of choice,I am using Scriptina here.
-This tutorial was written assuming you have working knowledge of PSP-

Dropshadow of choice for tut.

Open a new 700x700 whiter image.

Paste paper 4_3 as a new layer/layers/load save mask/load mask from disk/select mask/layers/merge/merge group.

Paste frame 1_4/resize 25%/image/resize all layers 25%.

Click inside frame with your magicwand/selections/modify/expand by 6.
Paste paper 1_3 below frame layer/selections/invert/delete/deselect.

Paste doodle 1_2 below paper layer/resize 50%/position to the right of the tag/layers/duplicate/image/mirror/image/flip.

Paste bird 1_3/resize 50%/edit/repeat resize/position.

Paste bug 2_2/resize 50%/edit/repeat resize/layers/duplicate/position both.
Repeat with butterfly 2_4.

Paste music note 1_6/resize 50%/position/dropshadow.

Repeat with music note 1_5.

Paste tube/position.

Hide mask and white background layers/layers/merge/merge visible/apply dropshadow/unhide layers.

Add copyrights.

Add name.

Layers/merge/merge visible.

Resize all layers 15%.

Save.
Hope you enjoyed my tut,would love to see your results and add it to my gallery :)

Hugs,Mary

Garden Of Love


Tube of choice,I am using PinUpToons,which you can purchase here,do not use unless you have a license to do so.

Scrapkit is Food For Life by DeLoris at Del's PSP Emporium here. Make sure to read why this kit is so important :) Thank you DeLoris for the awesome kit!

Template of choice,I am using template 31 by AquaRebel here.

Mask of choice,I am using grunge mask 2 from Rose at Creative Misfits Creations here.

Font of choice,I am using Monotype Corsiva,came with my psp program.
-This tutorial was written assuming you have working knowledge of PSP-

Open mask,minimize.

Open template/hit shiftD to duplicate/close the orginal/delete credit layer.

Highlight white background layer/paste paper 6_1/right click on paper layer/new mask layer/from image/select mask/ok/layers/merge/merge group.
Highlight and click on raster 1 layer with your magicwand/paste paper 2 into selection(edit)/deselect.

Repeat with copy of raster 1 layer.

Repeat with raster 2 layer using paper 3_1.

Repeat with copy raster 2 layer.

Repeat with raster 3 layer using paper 4

Repeat with raster 5 layer using paper 1_1.

Highlight copy of raster 3 layer/selections/select all/float/defloat/flood fill white/paste tube as a new layer/resize if desired/position/selections/invert/delete/deselect.

Raster 4 I am leaving as is.

Highlight and click on raster 6 with your magicwand/paste paper 1 into selection/deselect.

Repeat with copy of raster 6 layer.

Hide mask and white background layer/layers/merge/merge visible/apply dropshadow of choice/unhide layers.

Paste border 4 below merged layers/resize 50%/layers/duplicate/position.

Paste flower 3/resize 50%/layers/duplicate/position/dropshadow of choice.

Paste wordart 3/resize 60%/position/same dropshadow.

Open border 5 layer/using your selection tool or freehand selection tool/section it out(draw around to where you see the dancing lines around the bee you are wanting to use)/edit/copy/active your working canvas/paste/ resize 25%/layers/duplicate 2 times/position/dropshadow.

Repeat selections with border 2/erase any extras apple/resize 30%/layers/duplicate 2 times/position/dropshadow.

Add copyrights.

Add name.

Layers/merge/merge visible.

Resize all layers 5%.

Save.
Hope you enjoyed my tut,would love to see your results and add it to my gallery :)

Hugs,Mary

Hoppy Easter


Scrapkit is Hoppy Easter by Stacey at Stacey's Designs here and you can purchase it here. Thank you Stacey for this awesome kit!!

Mask of choice,I am using Vix mask 178 here.

Font of choice,I am using Eurostile,came with my psp program.
-This tutorial was written assuming you have working knowledge of PSP-

Open mask,minimize.

Open a new 700x600 white image.

Paste paper 7/right click on paper layer/new mask layer/from image/select mask/ok/layers/merge/merge group/layers/duplicate/position.

Paste pink plaid frame/resize 35%/image/flip/position(see my tag for reference)/click inside frame with your magicwand/selections/modify/expand by 6.

Paste paper 23 below frame layer/selections/invert/delete/do not deselect.

Paste eggs in grass/resize 50%/position/delete/deselect/dropshadow of choice.
Paste happy easter bunny/resize 50%/position/dropshadow:

Vertical 3
Horizonal 3
Opacity 27
Blur 0

Paste pink plaid bow/resize 50%/position/same dropshadow.

Paste ballooons/resize 20%/position/same dropshadow.

Repeat with streamer.

Paste chick in basket/resize 35%/position/dropshadow:

Vertical 4
Horizonal 4
Opacity 35
Blur 5

Paste girl bunny/resize 30%/position/same dropshadow.

Paste double butterfly/resize 57%/edit/repeat resize/layers/duplicate/position both layers/same dropshadow.

Paste ducky/resize 60%/position/same dropshadow.

Paste Stacey doll/resize 20%/position/dropshadow:

Vertical 5
Horizonal 5
Opacity 60
Blur 7

Repeat with Stacery 4.

Add copyrights.

Add name.

Layers/merge/merge visible.

Resize all layers 25%.

Save.
Hope you enjoyed my tut,would love to see your results and add it to my gallery :)

Hugs,Mary

Tuesday, March 23

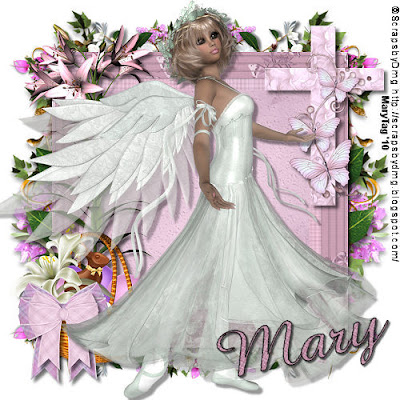
Easter Angel


Tube of choice,I am using Shawli,which you can purchase here,do not use unless you have a license to do so.

Scrapkit is Happy Easter by Dee at Scraps By Dmg here and you can purchase it here. Beautiful kit Dee,thank you!

Mask of choice.

Script font of choice.
This tutorial was written assuming you have working knowledge of PSP-

Dropshadow for tut:
Vertical 5
Horizonal 5
Opacity 31
Blur 3
 
Open mask,minimize.

Open a new 600x700 white image/paste frame 8 as a new layer/image/resize all layers 23%/click inside frame with your magicwand/selections/modify/expand by 5.

Paste paper 9 below frame layer/selections/invert/delete/do not deselect.

Paste tube/position/delete/deselect/dropshadow.

Hide white background layer/layers/merge/merge visible/dropshadow/unhide layer/position merged layers.

Paste paper 19/right click on paper layer/new mask layer/from image/select mask/ok/layers/merge/merge group/layers/duplicate/position.

Paste doodle 9 below merged layers/resize 35%/position to the right of the tag/layers/duplicate/image/mirror/layers/duplicate/image/flip/image/mirror/position/dropshadow.
Paste frame 2/resize 30%/layers/duplicate/position both layers/dropshadow.
Paste bow 6/resize 50%/edit/repeat resize/position/dropshadow.

Paste daisies 4/resize 40%/position/dropshadow.

Paste daisies 3/resize 45%/position/dropshadow.

Paste bunnies/resize 30%/edit/repeat resize/position/dropshadow.

Add copyrights.

Add name.

Layers/merge/merge visible.

Resize all layers 3%.

Save.
Hope you enjoyed my tut,would love to see your results and add it to my gallery :)

Hugs,Mary

Monday, March 22

Sexy Maid


Tube of choice,I am using Bettie Page/Olivia,which you can purchase here,do not use unless you have a license to do so.

Scrapkit is Sexy Maid by Heike at Fantasy Dreams Designz here and you can purchase it here. This kit is stunning,thank you Heike!

Font of choice,Scriptina here.
-This tutorial was written assuming you have working knowledge of PSP-

Open a new 600x600 white image.

Paste element 48(frame)/resize 25%/click inside frame with your magicwand/selections/modify/expand by 6.

Paste paper 11 below frame layer/resize 20%/position/selections/invert/delete/deselect/right click on frame layer/merge/merge down to paper layer/dropshadow:

Vertical 4
Horizonal 4
Opacity 28
Blur 3

Paste element 19 below merged layers/resize 35%/position to the left of the frame/layers/duplicate/image/mirror/dropshadow to both layers.

Paste element 26/resize 35%/image/free rotate to the right 90 degrees/position towards the top of the frame using your pick tool/layers/duplicate/image/flip/image/flip/image/free rotate to the right 90 degrees/position/same dropshadow to both layers.

Paste element 39/resize 10%/position.

Paste element 60/resize 40%/position/dropshadow:

Vertical 5
Horizonal 5
Opacity 46
Blur 4

Repeat with element 61.

Repeat with element 84.

Paste element 74/resize 15%/position/same dropshadow.

Paste element 8(bow)/resize 50%/layers/duplicate/position/dropshadow:

Vertical 3
Horizonal 3
Opacity 34
Blur 4

Paste element 68/resize 50%/edit/repeat resize/layers/duplicate 2 times/position/same dropshadow.

Paste element 12/resize 50%/position/same dropshadow.

Paste tube/position/dropshadow:

Vertical 6
Horizonal 6
Opacity 50
Blur 8

Add copyrights.

Add name.

Layers/merge/merge visible.

Resize all layers 15%.

Save.
Hope you enjoyed my tut,would love to see your results and add it to my gallery :)

Hugs,Mary

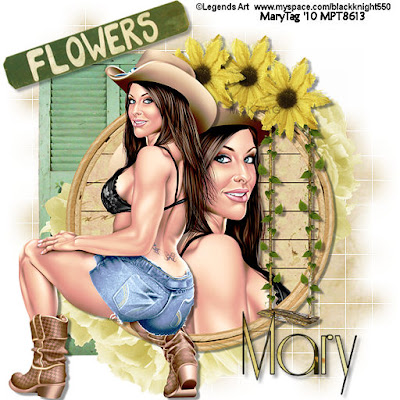
Country Sunshine


Tube w/close up of choice,I am using Legends Art,which you can purchase here,do not use unless you have a license to do so.

Scrapkit is Country Sunshine,an addon freebie by Susan Darter at Raspberry Road Designs here. Thank you Susan,its awesome!

Mask of choice.

Font of choice,I am using Riesling here.

-This tutorial was written assuming you have working knowledge of PSP-

Open a new 600x600 white image/paste element 11(frame) as a new layer/resize 40%/edit/repeat resize/click inside frame with your magicwand/selections/modify/expand by 5.

Paste paper 4 below frame layer/resize 40%/selections/invert/delete/do not deselect.

Paste close up/position/delete/deselect/dropshadow of choice(use this dropshadow for entire tut).

Hide white background layer/layers/merge/merge visible/dropshadow/unhide layer.

Make sure merged layers is highlighted/resize 20%.

Paste paper 1 below merged layers/layers/load save mask/load mask from disk/select mask/ok/layers/merge/merge group/layers/dup0licate/position.

Paste element 20/resize 50%/edit/repeat resize/position.

Paste element 15(flower)/resize 50%/layers/duplicate/position opposite of mask layers.

Paste swing/resize 60%/edit/repeat resize/position/dropshadow.

Paste sunflower/resize 50%/edit/repeat resize 2 times/layers/duplicate 2 times/position/dropshadow.

Paste element 21/resize 50%/edit/repeat resize/position/dropshadow.

Paste tube/position/dropshadow.

Add copyrights.

Add name.

Layers/merge/merge visible.

Resize all layers 15%.

Save.
Hope you enjoyed my tut,would love to see your results and add it to my gallery :)

Hugs,Mary

Sunday, March 21

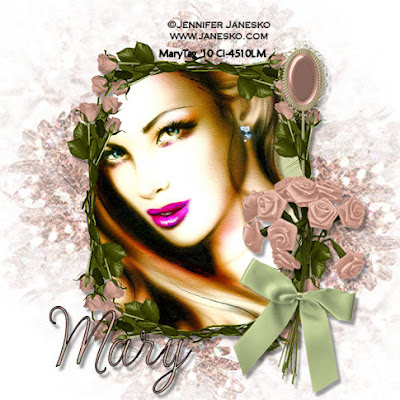
Country Roses


Tube of choice,I am using Jennifer Janesko,which you can purchase here,do not use unless you have a license to do so.

Scrapkit is Country Roses by Liz at Bluebird Designs here and you can purchase it here. Beauitful kit Liz,thank you!!!

Mask of choice,I am using Vix mask 82 here.

Script font of choice.
-This tutorial was written assuming you have working knowledge of PSP-

Dropshadow for tut:
Vertical 5
Horizonal 4
Opacity 36
Blur 4

Open mask,minimize.

Open a new 500x500 white image.

Open glitter 3 tile/go to materials/click on foreground stroke properties/pattern/select glitter tile/flood fill white image/right click on image/new mask layer/from image/select mask/ok/layers/merge/merge group/image/resize larger by 20%/layers/duplicate/image/mirror/image/flip.

Layers/new raster layer/right click on new layer/arrange/move down/flood fill white.

Paste rose frame 4/image/free rotate to the right 90 degrees/image/resize 15%/click inside frame using your magicwand/selections/modify/expand by 5.

Paste paper 2 below frame layer/selections/invert/delete/do not deselect.

Paste tube/position/delete/deselect/dropshadow.

Hide masks and white background layers/layers/merge/merge visible/dropshadow/unhide layers.

 
Open ribbon roses layer/using your selection tool or freehand selection tool/section it out(draw around to where you see the dancing lines around the ribbon rose you are wanting to use)/edit/copy/active your working canvas/paste/ resize 40%/position/dropshadow.

Repeat with bows.

Repeat with stickpins resizing 50%/after positioning/use erase tool to erase part of the pin to look like it is going thru where you positioned it.

Add copyrights.

Add name.

Layers/merge/merge visible.

Resize all layers 3%.

 
Save.
Hope you enjoyed my tut,would love to see your results and add it to my gallery :)

Hugs,Mary

Here Kitty Kitty


Scrapkit is Here Kitty Kitty by Funky at Wishing On A Starr here and you can purchase it here. Gorgeous kit Funky,the colors are gorgeous and love the posers which are by Sinful Mindz here. Thank you!

Mask of choice,I am using Vix mask 171 here.

Font of choice,I am using Carolingia here.
-This tutorial was written assuming you have working knowledge of PSP-

Open mask,minimize.

Open a new 700x600 white image.

Paste paper 12 as a new layer/right click on layer/new mask layer/from image/select mask/ok/layers/merge/merge group/layers/duplicate/position.

Paste cluster frame/click inside frame with your magicwand/selections/modify/expand by 5.

Paste paper 17 below frame layer/resize 30%/position/selections/invert/delete/deselect/image/resize all layers 22%.

Right click on frame/merge/merge down to paper layer/dropshadow:

Vertical 3
Horizonal 3
Opacity 51
Blur 2

Paste circluar frame below merged layers/resize 25%/position.

Paste tree/resize 50%/position to the left of the tag/layers/duplicate/image/mirror/dropshadow:

Vertical 6
Horizonal 6
Opacity 27
Blur 3

Paste blue star/resize 50%/edit/repeat resize/position/same dropshadow.

Repeat with bow.

Paste candle/resize 50%/position/same dropshadow.

Paste butterfly/resize 60%/edit/repeat resize/layers/duplicate 2 times/position/dropshadow:

Vertical 2
Horizonal 2
Opacity 30
Blur 3

Paste element below butterfly layers/resize 60%/layers/duplicate 3 times/position/same dropshadow.

Paste bird/resize 60%/edit/repeat resize/position/same dropshadow.

Paste photo frame/resize 60%/position/click inside heart with your magicwand/selections/modify/expand by 4/paste paper 2 below frame layer/selections/invert/delete/deselect/right click on frame/merge/merge down to paper layer/dropshadow.

Paste kitty katz poser 3_2/resize 20%/edit/repeat resize/position/dropshadow:
Vertical 5
Horizonal 4
Opacity 39
Blur 4

Repeat with kitty katz poser 3_4.

Add copyrights.

Add name.

Layers/merge/merge visible.

Resize all layers 7%.

Save.
Hope you enjoyed my tut,would love to see your results and add it to my gallery :)

Hugs,Mary

Friday, March 19

Time In A Day


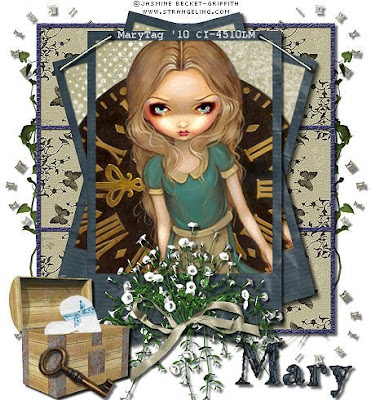
Tube of choice,I am using Jasmine Becket-Griffith,which you can purchase here,do not use unless you have a license to do so.

Scrapkit is Just A Day by Wilma at Wilma4ever here and you can purchase it here. Awesome,stunning kit Wilma,thank you!!

Font of choice,I am using Old Copperfield here.
-This tutorial was written assuming you have working knowledge of PSP-

Dropshadow of choice for tut.

Open frame 2/hit shiftD to duplicate/close orginal/image/canvas size/change to 650x700/image/resize all layers 30%/image/resize frame larger by 20%(make sure all layers is unchecked)/layers/new raster layer/right click on new layer/arrange/move down/flood fill white.

Highlight and click inside frame with your magicwand/selections/modify/expand by 5.

Paste paper 3 below frame layer/selections/invert/delete/do not deselect.

Paste tube/position/delete/deselect/dropshadow.

Right click on frame layer/merge/merge down to paper layer/apply dropshadow/resize 5%/position/layers/duplicate 2 times/rename layers 1,2 and 3 going from top to bottom/highlight layer 3/image/free rotate/to the right 15 degrees/repeat with layer 2 going to the left 15 degrees/layer 1 as is(in center)/right click on layer 1/merge/merge down to layer 3/apply dropshadow.

Paste frame 3 below merged layers/resize 40%/position/hide merge layers/make sure frame 3 layer is highlighted/click inside all squares with your magicwand/selections/modify/expand by 3.

Paste paper 12 below frame 3 layer/selections/invert/delete/deselect/right click on frame 3 layer/merge/merge down to paper layer/dropshadow/unhide merged layers.

Highlight white background layer/paste clock 1/resize 50%/layers/duplicate 5 times/position around frame(see my tag for reference)/right click on top clock layer/merge/merge down to bottom clock layer/dropshadow.

Paste leaves/resize 50%/position to the right of the tag so just alittle is showing with your pick tool/layers/duplicate/image/mirror.

Moving up top/paste plant/resize 55%/position/dropshadow.

Repeat with bow 2.

Repeat with box 2/selections/select all/float/defloat/paste heart tag 1/resize 55%/edit/repeat resize/position on the lid of box half way thru heart/delete/deselect/using pick tool/position by opening of box(see my tag for reference)/no dropshadow.

Paste key/resize 40%/edit/repeat resize/position with pick tool/dropshadow.

Paste staple 1/position to the right/layers/duplicate/image/mirror/dropshadow.

Add copyrights.

Add name.

Layers/merge/merge visible.

Save.
Hope you enjoyed my tut,would love to see your results and add it to my gallery :)
Hugs,Mary

Thursday, March 18

Enchanted Dreams


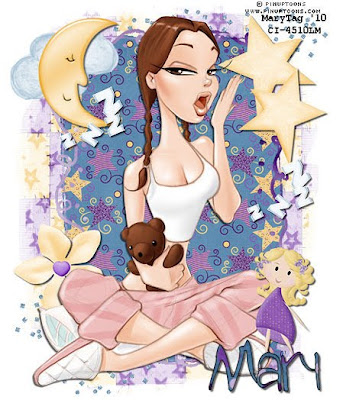
Tube of choice,I am using PinUpToons,which you can purchase here,do not use unless you have a license to do so.


Scrapkit is Enchanted Dreams by Lynn of Designs by Moo here and you can purchase it here.This kit is awesome,thank you Lynn!!


Mask of choice,I am using star mask 7 by AquaRebel 315 from Creative Misfits Creatiosn here.


Font of choice,I am using Bestest Buddies here.


-This tutorial was written assuming you have working knowledge of PSP-


Dropshadow for tut:
Vertical 2
Horizonal 2
Opacity 62
Blur 2


Open mask,minimize.


Open a new 500x600 white image/paste doodle frame/image/free rotate to the right 90 degrees.


Click inside frame with your magicwand/selections/modify/expand by 5.


Paste paper 7 below frame layer/resize 20%/selections/invert/delete/deselect/image/resize all layers 22%.


Right click on frame layer/merge/merge down to paper layer/dropshadow.


Paste paper 5 below merged layers/right click on paper layer/new mask layer/from image/select mask/ok/layers/merge/merge group.


Paste glitter sprinkle/resize 50%/layers/duplicate/position.


Paste colored cloud/resize 50%/edit/repeat resize/position/dropshadow.


Repeat with moon.


Repeat with tiny flower 1.


Paste colored star/resize 50%/edit/repeat resize/position/layers/duplicate/resize copy star layer another 10%/dropshadow to both layers.


Paste tube/position/dropshadow.


Paste little girl/resize 50%/edit/repeat resize/position/dropshadow.


Paste zzz's/resize 60%/edit/repeat resize/layers/dupliocate/position/dropshadow.


Add copyrights.


Add name.


Layers/merge/merge visible.


Resize all layers 4%.


Save.


Hope you enjoyed my tut,would love to see your results and add it to my gallery :)


Email me


Hugs,Mary
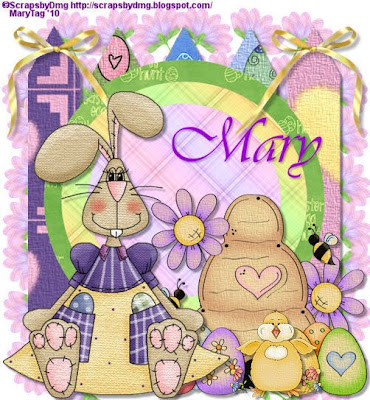
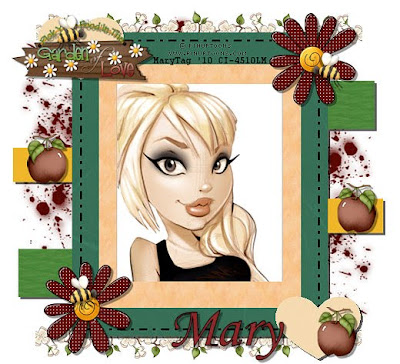
Easter Sunrise


Scrapkit is Easter Sunrise with posers by Dee at Scraps By Dmg here and you can purchase it here.

Font of choice,I am using Abbeyline here.
-This tutorial was written assuming you have working knowledge of PSP-

Open frame 5/hit shiftD to duplicate/close the orginal/layers/new raster layer/right click on new layer/arrange/move down/flood fill white/highlight frame layer/resize 23%.

Click inside frame with your magicwand/selections/modify/expand by 6.

Paste paper 17 below frame layer/resize 20%/edit/repeat resize/selections/invert/delete/deselect/right click on frame layer/merge/merge down to paper layer/dropshadow:

Vertical 3
Horizonal 3
Opacity 61
Blur 4

Paste flower 6 below merged layers/resize 7%/position to the left of the frame/layers/duplicate/image/mirror.

Paste flowers 7/resize 7%/position to the top of the frame/layers/duplicate/image/flip.

Moving up top/paste flowers 4/resize 30%/position/dropshadow:

Vertical 4
Horizonal 4
Opacity 54
Blur 5

Paste basket 2/resize 50%/position/same dropshadow.

Paste bow 4/resize 50%/edit/repeat resize/position/same dropshadow.

Paste cross 1/resize 50%/position/same dropshadow.

Paste angel tube/position/dropshadow:

Vertical 5
Horizonal 5
Opacity 40
Blur 3

Add copyrights.

Add name.

Layers/merge/merge visible.

Save.
Hope you enjoyed my tut,would love to see your results and add it to my gallery :)

Hugs,Mary
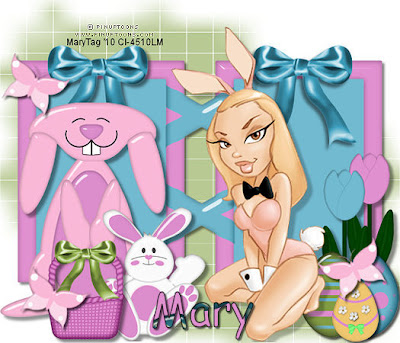
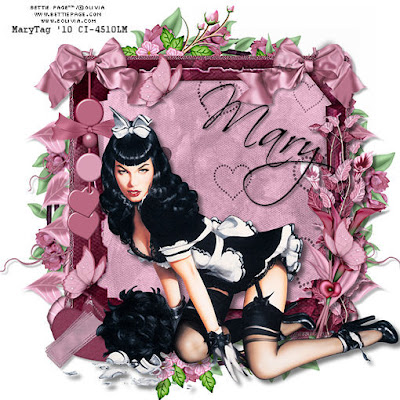
Bunny Blast


Tube of choice,I am using PinUpToons,which you can purchase here,do not use unless you have a license to do so.

Scrapkit is Bunny Blast by Von at Soaring Hawks Nest here and you can purchase it here. Awesome kit Von,love the bunnies! Thank you!

Mask of choice,I am using WSL mask 84 here.

Font of choice,I am using Comic Sans MS,came with my psp program.
-This tutorial was written assuming you have working knowledge of PSP-

Open a new 700x600 white image.

Open frame 2/paste as a new layer/resize 33%/click inside both sides of frame with your magicwand/selections/modify/expand by 5.

Paste paper 4 below frame layer/selections/invert/delete/deselect/right click on frame layer/merge/merge down to paper layer/dropshadow:

Vertical 4
Horizonal 4
Opacity 50
Blur 6/image/resize all layers 23%.

Paste paper 10 below merged layers/right click on paper layer/new mask layer/from image/select mask/ok/layers/merge/merge group/position to the left of the tag/layers/duplicate/image/mirror/image/flip/right click on copy mask layer/merge/merge down to orginal mask layer/right click on masks layer/properties/change opacity to 59.

Paste basket/resize 50%/edit/repeat resize/position/same dropshadow we last used.

Repeat with bow 3.

Paste bow 2/resize 60%/layers/duplicate/position/same dropshadow.

Paste bunny 1/resize 40%/position/dropshadow:

Vertical 5
Horizonal 5
Opacity 43
Blur 5

Paste bunny 3/resize 40%/edit/repeat resize/position/same dropshadow.

Paste tulip 1/resize 64%/positon/same dropshadow.

Repeat with tulip 3.

Paste egg 15/resize 50%/edit/repeat resize/position/dropshadow:

Vertical 3
Horizonal 3
Opacity 66
Blur 4

Repeat with eggs 6&8.

Paste butterfly 3/resize 60%/edit/repeat resize/layers/duplicate 2 times/position/same dropshadow.

Paste tube/resize if needed/position/dropshadow:

Vertical 7
Horizonal 7
Opacity 23
Blur 4

Add copyrights.

Add name.

Layers/merge/merge visible.

Resize all layers 3%.

Save.
Hope you enjoyed my tut,would love to see your results and add it to my gallery :)
Hugs,Mary

Sweet Easter


Scrapkit is Easter Sweets by Dee at Scraps By Dmg here and you can purchase it here. Awesome,colorful kit Dee,thank you!!

Template of choice,I am using template 20 by Simply Devilish Scrapz here.

Script font of choice,I am using Vivaldi,came with my psp program.
-This tutorial was written assuming you have working knowledge of PSP-

Open template/hit shiftD to duplicate/close orginal/delete credit layer.

Open 5 papers of choice for the diamond backing(I am using 1,2,6,8 and 9)/using your magicwand/click on first diamond/paste paper of choice as a new layer/position/selections/invert/delete/deselect.

Repeat for each diamond using a different paper.

Hide white background layer and all 3 circle layers/layers/merge/merge visible/dropshadow of choice/unhide all layers.

Highlight circle 1/selections/select all/float/defloat/edit/paste paper 5 into selection/deseelct/same dropshadow last used.

Repeat with circle 2 using paper 19.

Repeat with circle 3 using paper 18.

Hide white background layer/layers/merge/merge visible/resize 10%/unhide background layer/image/resize all layers 7%.

Paste flower 1 below merged layers/layers/duplicate 5 times/position across top of tag/merge those layers only/layers/duplicate/image/free rotate to the right 90 degrees/position/layers/duplicate/image/mirror.

Paste bow 1/resize 55%/layers/duplicate/position/dropshadow:

Vertical 5
Horizonal 5
Opacity 30
Blur 5

Paste eggsNbees/resize 40%/position/same dropshadow.

Paste bunny 2/resize 5%/edit/repeat resize/position/dropshadow:

Vertical 4
Horizonal 4
Opacity 36
Blur 3

Paste chick/resize 50%/edit/repeat resize/position/same dropshadow.

Add copyrights.

Add name.

Layers/merge/merge visible.

Save.
Hope you enjoyed my tut,would love to see your results and add it to my gallery :)

Hugs,Mary
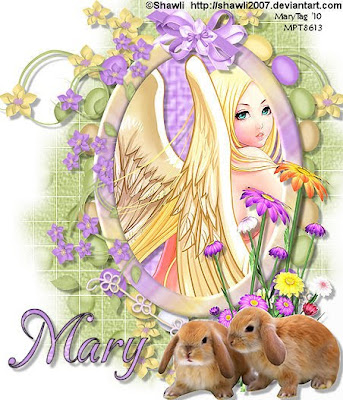
Tuesday, March 16

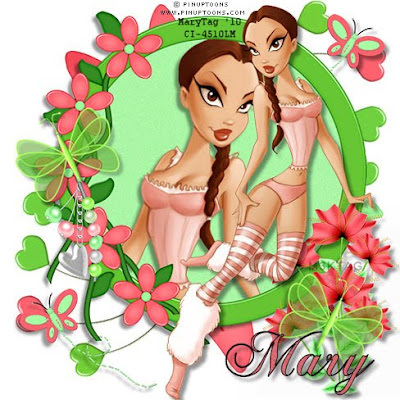
Watermelon Kisses


Tube/close up of choice,I am using PinUpToons,which you can purchase here,do not use unless you have a license to do so.


Scrapkit is Watermelon Kisses by Stacey at Stacey's Designs here and you can purchase it here. So love the colors in this kit!! Thank you Stacey!


Font of choice,I am using Chopin Script here.


-This tutorial was written assuming you have working knowledge of PSP-


Dropshadow for tut:
Vertical 5
Horizonal 5
Opacity 42
Blur 6


Open a new 600x600 white image.


Paste flower round frame 2 as a new layer/image/resize all layers 15%/resize frame layer 20%/click inside frame with your magicwand/make sure to get all white area's by the flowers/selections/modify/expand by 6.


Paste paper 10 below frame layer/selections/invert/delete/do not deselect.


Paste close up/position/delete/deselect/dropshadow/right click on frame layer/merge/merge down to paper layer/resize 10%/dropshadow/image/mirror/position.


Paste decorated flower below merged layers/resize 30%/position towards top of tag/layers/duplicate/image/flip/image/mirror.


Paste trailing butterfly 2/resize 50%/edit/repeat resize/position to the right with your pick tool/layers/duplicate/image/mirror/position/dropshadow.


Paste pearl pendant/resize 50%/edit/repeat resize/position/dropshadow.


Paste flower 1/resize 50%/edit/repeat resize/layers/duplicate/position/dropshadow.


Paste trandsparent butterfly 2/resize 60%/edit/repeat resize/layers/duplicate/position/dropshadow.


Paste tube/position/dropshadow.


Add copyrights.


Add name.


Layers/merge/merge visible.


Resize all layers 4%.


Save.


Hope you enjoyed my tut,would love to see your results and add it to my gallery :)


Email me


Hugs,Mary
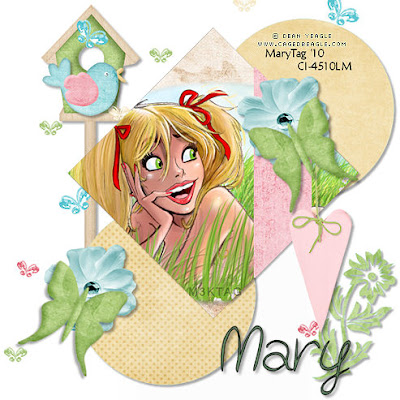
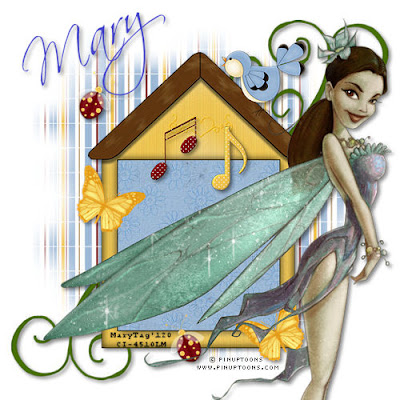
One Fine Day


Tube of choice,I am using Dean Yeagle,which you can purchase here,do not use unless you have a license to do so.

Scrapkit is One Fine Day by Kristi at Scrapin Divaz here and you can purchase it here. Awesome kit Kristi,thank you!

Template of choice,I am using template 73 by Bev at HorsePlay's Pasture here. Thank you Bev!

Font of choice,I am using Post-it Penscript here.
-This tutorial was written assuming you have working knowledge of PSP-

Dropshadow for tut:
Vertical 3
Horizonal 3
Opacity 35
Blur 4

Open template/hit shiftD to duplicate/close orginal/delete credit layer.

Highlight circle 1 layer/selections/select all/float/defloat/paste paper 5 into selection(edit)/deselect.

Repeat with circle 2 layer using paper 10.

Repeat with flower layer using paper 6.

Highlight strip layer/selections/select all/float/defloat/paste paper 3 as a new layer/selections/invert/delete/deselect/delete strip layer/position paper layer.
Highlight diamond layer/selections/select all/float/defloat/paste paper 11 as a new layer/position/selections/invert/delete/do not deselect.

Paste tube/position/delete/deselect/dropshadow/right click on tube layer/merge/merge down to diamond layer/dropshadow.

Apply same dropshadow to all layers/position/image/resize all layers 13%.

Highlight white background layer/paste butterfly spray/resize 40%.

Repeat with birdhouse.

Paste bird/resize 50%/edit/repeat resize/position/dropshadow.

Paste hanging heart/resize 60%/position/dropshadow.

Paste flower 1/resize 60%/layers/duplicate/position/dropshadow.

Paste butterfly 4/resize 40%/layers/duplicate/position/dropshadow.

Add copyrights.

Add name.

Layers/merge/merge visible.

Resize all layers 5%.

Save.
Hope you enjoyed my tut,would love to see your results and add it to my gallery :)
Hugs,Mary
Monday, March 15

Ms.Lucky


Tube of choice,I am using Greg Andrews,which you can purchase here,do not use unless you have a license to do so.

Template is by Von at Soaring Hawks Nest here. Love this template,thank you Von!

Mask of choice, I am using St.Pattys mask 53 by Aqua at Creative Misfits Creations here.

Font of choice,I am using Ageone here.
-This tutorial was written assuming you have working knowledge of PSP-
Open mask,minimize.

Open template/hit shiftD to duplicate/close the orginal/delete credit layer/image/canvas size/change to 520x520/layers/new raster layer/right click on new layer/send to bottom/flood fill white.

Hightlight and click on backing layer with your magicwand/color fill with choice of color,I am using #3b763a/paste tube/position/selections/invert/delete/deselect/dropshadow:

Vertical 5
Horizonal 5
Opacity 53
Blur 3/effects/texture effects/blinds/thin vertical/width 10/opacity 20/color white/light from top left checked/ok.

Highlight circle frame/selections/select all/float/defloat//flood fill black or color of choice/deselect.

Right click on top shamrock layer/merge/merge down to bottom shamrock/resize 15%/layers/duplicate/image/flip/image/mirror/right click on copy layer/merge down/dropshadow:

Vertical 4
Horizonal 4
Opacity 55
Blur 5

Highlight Ms Lucky layer/resize 20%/adjust/brigtness-contrast/brightness/contrast/settings:dull
Brightness:-255
Contrast 0
ok/apply same dropshadow we last used/right click on ms lucky layer/merge/merge down to shamrock layer/layers/duplicate 2 times/rename layers s1,s2 and s3/we will come back to this later.

Highlight raster 1 layer/color fill of choice,I am using #004000/right click on layer/new mask layer/from image/select mask/load/layers/merge/merge group/layers/duplicate/image/mirror/image/flip/position.

Add copyrights.

Add name.

Image/resize all layers 5%

 
Highlight s1 layer/effects/dsb flux/bright noise/lighter checked at intensity at 28.

Repeat on s2 layer/intensity at 29.

Repeat on s3 layer/intensity at 30.

Highlight s1 layer/hide 2&3/edit/copy merged.

Take to AS and paste as a new animation.

Back to psp,hide s1,unhide and highlight s2/edit/copy merged/paste in AS after current frame/repeat with s3 layer.

Save as gif.
Hope you enjoyed my tut,would love to see your results and add it to my gallery :)

Hugs,Mary
Purple


Tube of choice,I am using Alayna Magnan,which you can purchase here,do not use unless you have a license to do so.

Scrapkit is Purple from Angela at Bastelgalaxy here and you can purchase this awesome kit here. Thank you Angela!!

Font of choice.
-This tutorial was written assuming you have working knowledge of PSP-

Dropshadow of choice for tut.

Open frame 1/hit shiftD to duplicate/close orginal/image/resize all layers 20%/layers/new raster layer/right click on new layer/arrange/move down/flood fill white/highlight frame layer/resize 10%(make sure all layers is unchecked).

Click in center of frame with your magicwand/selections/modify/expand by 6.
Paste paper 6 below frame layer/selections/invert/delete/do not deselect.

Paste tube/position/delete/deselect/dropshadow.

Hide white background layer/layers/merge/merge visible/dropshadow/unhide layer.

Paste doodle 3/layers/duplicate/position both layers.

Paste bow 8/resize 50%/position/dropshadow.

Paste leave 1/position/dropshadow.

Paste flower 12/resize 40%/layers/duplicate/position/dropshadow.

Paste button 2/resize 50%/position/dropshadow.

Paste butterfly 3/resize 50%/edit/repeat resize/layers/duplicate/position/dropshadow.

Paste tag 2/resize 50%/position with pick tool at a slant/dropshadow.

Add copyrights.

Add name.

Layers/merge/merge visible.

Resize all layers 5%.

Save.
Hope you enjoyed my tut,would love to see your results and add it to my gallery :)

Hugs,Mary

  © Blogger template Customization and Installation by Krissy's Scraps and Imaging 2011
Back to TOP