Friday, June 25

Timless

Photobucket

Tube of choice,I am using Barbara Jensen,which you can purchase here,do not use unless you have a license to do so.

Scrapkit is Timeless,a freebie by Doris at Scraps Dimensions here. Thank you for the beautiful kit!

Mask of choice.

Script font of choice.
-This tutorial was written assuming you have working knowledge of PSP-

Dropshadow of choice for tut.
Open the square box/hit shiftD to duplicate/close orginal/resize 20%(make sure all layers is unchecked)/layers/new raster layer/leave transparent/right click on new layer/arrange/move down.

Paste paper 9 below box layer/apply mask of choice/layers/duplicate/position.
Paste bling/resize 70%/layers/duplicate/position/dropshadow.

Highlight square box layer/selections/select all/float/defloat/paste clock/selections/invert/delete/deselect/right click on clock layer/properties/change opacity to 50.

Paste flower clip 1/resize 70%/position/dropshadow.

Paste flower pendant/resize 50%.position/dropshadow.

Paste tulip 3/resize 45%/position/dropshadow.

Paste butterfly 2/resize 50%/layers/duplicate/position/dropshadow.

Paste tube/position/dropshadow/edit/repeat dropshadow.

Image/resize all layers 15%.

Layers/merge/merge visible.

Add copyrights.

Add name.

Save as png.
Hope you enjoyed my tut,would love to see your results and show it off in my gallery :)

Email me here

Hugs,Mary

Pretty Ballerina

Photobucket

Tube of choice,I am using Ted Hammond,which you can purchase here,do not use unless you have a license to do so.

Scrapkit is Pretty Ballerina,a freebie at Scrappers Emporium here. Thank you for the beautiful kit!

Font of choice,I am using Riesling here.
-This tutorial was written assuming you have working knowledge of PSP-

Open a new 600x600 white image.

Paste frame as a new layer/resize 50%/edit/repeat resize/click inside frame with your magicwand/selections/modify/expand by 6.

Paste paper 2 below frame layer/resize 50%/selections/invert/delete/deselect.

Right click on frame layer/merge/merge down to paper layer.

Paste sachet below merged layers/resize 33%/edit/repeat resize.

Paste pendant/resize 50%/edit/repeat resize 2 times/position/dropshadow of choice.

Repeat with ballerina shoes.

Repeat with lillies/layers/duplicate/position/dropshadow.

Paste bow 2/resize 50%/edit/repeat resize 2 times/position/dropshadow.

Repeat with ballerina box.

Paste butterfly/resize 50%/edit/repeat resize 2 times/layers/duplicate/position/dropshadow.

Paste tube/position/dropshadow.

Paste wire heart/resize 50%/edit/repeat resize 2 times/position/dropshadow.
Delete white background layer/image/resize all layers 18%.

Layers/merge/merge visible.

Add copyrights.

Add name.

Save as png.
Hope you enjoyed my tut,would love to see your results and show it off in my gallery :)

Email me here

Hugs,Mary

Thursday, June 24

Love U

Photobucket

Tube of choice,I am using Oren Kramek,which you can purchase here,do not use unless you have a license to do so.

Scrapkit is Love U,a freebie by Scrap and Tubes here. Thank you for the adorable kit!!

Mask of choice,I am using love mask 3 by Rieka here.

Font of choice,I am using Sexy Thing Thin here.
-This tutorial was written assuming you have working knowledge of PSP-

Open mask,minimize.

Open a new 500x500 white image.

Paste frame/resize 45%/click inside frame with your magicwand/selections/modify/expand by 5.

Paste paper of choice below frame/selections/invert/delete/do not deselect.
Paste tube/position/delete/deselect/dropshadow of choice(use for entire)/right click on tube layer/properties/change opacity to 65.

Hide white background/layers/merge/merge visible/resize 20%/position/dropshadow/unhide layer.

Paste paper 3 below merged layers/right click on paper layer/new mask layer/from image/select/ok/layers/merge/merge group/layers/duplicate 2 times/position.

Paste bow 2/resize 50%/edit/repeat resize/layers/duplicate/position both bows/dropshadow.

Repeat with butterfly.

Paste ladybug pin/resize 50%/edit/repeat resize/position/dropshadow/using selections tool/select part of top pin/delete/position.

Paste tube/resize if needed/position/dropshadow.

Delete white background layer/resize all layers 3%.

Add copyrights.

Add name.

Layers/merge/merge visible.

Save as png.
Hope you enjoyed my tut,would love to see your results and show it off in my gallery :)

Email me here

Hugs,Mary

Elegance

Photobucket

Tubes of choice,I am using Jennifer Janesko,which you can purchase here,do not use unless you have a license to do so.

Scrapkit is Elegance,a freebie by Rieka_Rafita,her blog here and kit can be found at Misfits Creations here. Gorgeous kit Rieka,thank you!

Font of choice,I am using Scriptino Pro here.
-This tutorial was written assuming you have working knowledge of PSP-

Dropshadow for tut:
Vertical 5
Horizonal 5
Opacity 49
Blur 5

Open a new 500x500 white image.

Paste flower frame/resize 40%/click inside frame with your magicwand/selections/modify/expand by 6.

Paste paper 5 below frame layer/selections/invert/delete/do not deselect.

Paste tube/resize if desired/position/delete/deselect/dropshadow/right click on frame layer/merge/merge down to paper layer/same dropshadow.

Paste heart of roses frame/resize 50%/click inside roses frame with your magicwand/selections/modify/expand by 6.

Paste paper 2 below heart frame/selections/invert/delete/do not deselect.
Paste second tube/position/delete/deselect/dropshadow/right click on heart frame/merge/merge down to paper layer/dropshadow.

Paste glitter below frame layers/position.

Paste glass flower keychain 2/resize 45%/edit/repeat resize/position/dropshadow.

Paste bling pin/position/dropshadow.

Paste flower 3/resize 40%/edit/repeat resize/layers/duplicate/position/dropshadow.

Paste bow 1/resize 63%/position/dropshadow.

Delete white background layer/layers/merge/merge visible.

Add copyrights.

Add name.

Save as png.
Hope you enjoyed my tut,would love to see your results and show it off in my gallery :)

Email me here

Hugs,Mary

Wednesday, June 23

Simply Mauvelous

Photobucket
2 tubes or close ups of choice,I am using Jamie Kidd,which you can purchase here,do not use unless you have a license to do so.

Scrapkit is Simply Mauvelous,a freebie by Becky at Becky's Creations here. Thank you for the beautiful kit!

Mask of choice,I'm using AquaRebel mask 49 here.

Font of choice,I am using Abbeyline here.
-This tutorial was written assuming you have working knowledge of PSP-

Dropshadow for tut:
Vertical 6
Horizonal 6
Opacity 34
Blur 6

Open mask,minimize.

Open a new 600x600 white image.

Paste frame 3/layers/duplicate/position/right click on top frame layer/merge/merge down to first frame layer.

Click inside frames with your magicwand/selections/modify/expand by 5.

Paste paper 2 below frames layer/selections/invert/delete/do not deselect.

Paste tubes/position in each frame/delete/deselect/dropshadow.

Hide background/layers/merge/merge visible/dropshadow/unhide layer.

Paste swirl doodle 3/duplicate 3 times/position.

Repeat with swirl doodle 2.

Paste scalloped lace trim/resize 3%/layers/duplicate/position/dropshadow.
Paste butterfly 4/resize 30%/edit/repeat resize/layers/duplicate 3 times/position/dropshadow.

Paste bow 4/resize 40%/layers/duplicate/position/dropshadow.

Paste flower 3/resize 22%/layers/duplicate/position/dropshadow.

Hide white background layer/layers/merge/merge visible/resize 10%/unhide layer.

Paste paper 10 below merged layers/right click on paper layer/new mask layer/from image/select mask/ok/layers/merge/merge group/layers/duplicate 2 times/position.

Delete white background layer/image/resize all layers 17%.

Add copyrights.

Add name.

Layers/merge/merge visible.

Save as png.
Hope you enjoyed my tut,would love to see your results and show it off in my gallery :)

Email me here

Hugs,Mary

Tuesday, June 22

Passion

Photobucket

Tube/close up of choice,I am using Jose Cano,,which you can purchase here,do not use unless you have a license to do so.

Scrapkit is Passion,a freebie by Sky at Sky Scraps here. Thank you for the gorgeous kit!

Font of choice.
-This tutorial was written assuming you have working knowledge of PSP-

Open a new 700x600 white image.

Paste frame 10/resize 20%/click inside frame with magicwand/selections/modify/expand by 5.

Paste paper 12 below frame layer/selections/invert/delete/do not deselect/image/resize all layers 20%.

Paste close up/position/delete/deselect/dropshadow:

Vertical 4
Horizonal 4
Opacity 48
Blur 3

Right click on frame layer/merge/merge down to paper layer/resize 10%/position/same dropshadow.

Paste doodle glitter 2 below merged layers/resize 25%/layers/duplicate 2 times/position.

Paste glitter 1/resize 50%/layers/duplicate/position
Paste lil heart 1/resize 40%/position/dropshadow:

Vertical 2
Horizonal 2
Opacity 49
Blur 2

Paste decoration flower 3/resize 50%/edit/repeat resize/layers/duplicate 2 times/position around right top corner of frame/right click on top copy layer of flower/merge/merge down to bottom flower layer/layers/duplicate/image/flip/position/layers/duplicate/image/mirror/position/same dropshadow.

Paste butterfly 1/resize 55%/edit/repeat resize/layers/duplicate/position/same dropshadow.

Paste heart element 1/resize 40%/edit/repeat resize 3 times/position/same dropshadow.

Paste tube/position/dropshadow:

Vertical 5
Horizonal 5
Opacity 56
Blur 4

Delete white background layer.

Image/resize all layers 10%.

Layers/merge/merge visible.

Add copyrights.

Add name.

Save as png.
Hope you enjoyed my tut,would love to see your results and show it off in my gallery :)

Email me here

Hugs,Mary

Monday, June 21

Kidd Heart

Photobucket

Tube/close up of choice,I am using Jamie Kidd,which you can purchase here,do not use unless you have a license to do so.

Template 89 by Bev at HorsePlays Pasture here. Thank you for the awesome templates Bev!!

Mask of choice,I am using Vix mask0906 here.

Font of choice,I am using Precious here.
-This tutorial was written assuming you have working knowledge of PSP-

Open template/hit shiftD to duplicate/close orginal/delete credit layer/image/resize all layers 12%.

Highlight squareback/color fill of choice,I am using black/deselect.

Repeat on diamond back with color fill of choice,I am using #e11ae6.

Color fill strips with colors used but opposite of square&rectangle backs.

Highlight scalloped circle/selections/select all/float/defloat/flood fill color of choice,I am using #f4b6df/deselect.

Circle leave as is,we will come back to this layer.

Highlight circle frame/flood fill black.

Highlight hearts/selections/select all/float/defloat/color fill with color used on diamond back/deselect.

Highlight and click on circle layer with your magicwand/paste close up/position/selections/invert/delete/deselect/dropshadow of choice(use for entire tut).

Delete white background layer.

Layers/new raster layer/right click on new layer/arrange/send to bottom/flood fill color of choice/apply mask/resize larger by 21%.

Hide hearts layers/layers/merge/merge visible/dropshadow/unhide hearts layers.

Resize each layer 10%/apply dropshadow to square/rectangle layer only/position.

Paste tube/position/dropshadow.

Image/resize all layers 10%.

Add copyrights.

Add name.
Layers/merge/merge visible.
Save as png.
Hope you enjoyed my tut,would love to see your results and show it off in my gallery :)

Email me here

Hugs,Mary

Carefree Summer

Photobucket
Tube of choice,I am using Armando Huerta,which you can purchase here,do not use unless you have a license to do so.

Scrapkit is Carefree Summer,a freebie by Bev at HorsePlays Pasture here. Awesome k,it Bev,thank you!!

Bold font of choice.
-This tutorial was written assuming you have working knowledge of PSP-

Open frame 1/hit shiftD to duplicate/close the orginal/image/free rotate to the right 90 degrees/image/mirror/layers/new raster layer/move below frame layer/leave transparent.

Click inside frame with your magicwand/selections/modify/expand by 6.

Paste paper 10 below frame layer/resize 20%/selections/invert/delete/do not deselect.

Paste tube/position/delete/deselect/dropshadow:

Vertical -3
Horizonal -3
Opacity 38
Blur 5

Repeat dropshadow:

Vertical 3
Horizonal 3
Opacity 38
Blur 5

Right click on frame layer/merge/merge down to paper layer/same dropshadow/resize 15%.

Paste chicken wire below merged layers/resize 30%/adjust/color/red green blue/settings:

red% 50
green -50 %
blue 50%/ok.

Paste deco flower 1/resize 50%/position/dropshadow:

Vertical 2
Horizonal 2
Opacity 58
Blur 5

Repeat with deco flower 3.

Paste bow 1/resize 50%/layers/duplicate/position/same dropshadow.

Paste butterfly 2/resize 50%/edit/repeat resize/layers/duplicate/position/same dropshadow.

Paste birdhouse/resize 50%/position/dropshadow:

Vertical 4
Horizonal 3
Opacity 32
Blur 5

Paste bird/resize 50%/edit/repeat resize/position/same dropshadow.
Image/resize all layers 12%.

Add copyrights.

Add name.

Layers/merge/merge visible.

Save as png.
Hope you enjoyed my tut,would love to see your results and show it off in my gallery :)

Email me here

Hugs,Mary

Tuesday, June 15

In The Blue

Photobucket

Scrapkit is In The Blue by Lis at PSPgirl Place here and you can purchase it here or here. This kit rocks,comes with 8 gorgeous posers and tons of elements!! Thank you Lis!

Font of choice.
-This tutorial was written assuming you have working knowledge of PSP-

Dropshadow for tut:
Vertical 4
Horizonal 4
Opacity 52
Blur 5

Open a new 700x600 white image.

Paste element 18(frame) as a new layer/image/free rotate to the right 90 degrees/resize frame 25%/image/resize all layers 20%/click inside frame with your magicwand/selections/modify/expand by 6.

Paste paper 4 below frame layer/selections/invert/delete/do not deselect.

Paste element 30/resize 30%/position/delete/do not deselect.

Paste poser of choice,I am using #8/resize 35%/position/delete/deselect/dropshadow to poser and element 30 layers/hide white background layer/layers/merge/merge visible/dropshadow/unhide layer.
Resize merged layer 15%/position.

Paste element 51 below merged layers/resize 35%/position/dropshadow.

Paste element 12/resize 15%/layers/duplicate 2 times/position/dropshadow.

Paste element 32/resize 50%/position/dropshadow.

Repeat with element 47.

Repeat with element 54.

Paste element 21(bow)/resize 50%/edit/repeat resize/layers/duplicate/position/dropshadow.

Paste element 36/resize 50%/edit/repeat resize/layers/duplicate/position/dropshadow.

Repeat with element 37.

Paste poser 4/resize 23%/position/dropshadow.

Repeat with poser 5.

Delete white background layer/image/resize all layers 11%.

Layers/merge/merge visible.

Add copyrights.

Add name.

Save as png.
Hope you enjoyed my tut,would love to see your results and show it off in my gallery :)

Email me here

Hugs,Mary

Monday, June 14

Lovin' Summer

Photobucket

Tube of choice,I am using Jamie Kidd,which you can purchase here,do not use unless you have a license to do so.

Scrapkit is Summer Lovin by Stacey at Stacey's Designs here and you can purchase it here. Such an awesome kit Stacey! Thank you!

Mask of choice.

Font of choice,I am using Reklame Script here.
-This tutorial was written assuming you have working knowledge of PSP-

Open fence frame/hit shiftD to duplicate/close orginal/image/resize all layers 20%/layers/new raster layer/flood fill white/right click on new layer/arrange/move down/highlight and resize frame only 10%.

Click inside frame with your magicwand/selections/modify/expand by 6.

Paste paper 25 below frame layer/resize 30%/edit/repeat resize/selections/invert/delete/deselect/right click on frame layer/merge/merge down to paper layer/dropshadow of choice(use for entire tut).

Paste paper 3 below merged layers/apply mask of choice/duplicate/position.

Paste journal tag 2/resize 50%/position/dropshadow.

Paste umbrella/resize 50%/position/dropshadow.

Paste tube of choice/resize if needed/position/dropshadow.

Paste shoelace bow/resize 40%/edit/repeat resize/position/using your eraser tool/erase bow going over tube layer/dropshadow.

Paste bucket/resize 50%/position/dropshadow.

Paste watermelon/resize 55%/edit/repeat resize/position/dropshadow.
Repeat with beach ball.

Paste surf board/resize 30%/position/dropshadow.

Paste flower chain/resize 40%/position/dropshadow.

Paste heart sunglasses/resize 60%/position/dropshadow.

Paste photo prong 2/resize 50%/edit/repeat resize/image/free rotate to the right 90 degrees/position/dropshadow.

Delete white background layer/image/resize all layers 7%/layers/merge/merge visible.

Add copyrights.

Add name.

Save as png.
Hope you enjoyed my tut,would love to see your results and show it off in my gallery :)

Email me here

Hugs,Mary

Pastellage

Photobucket

2 tubes of choice,I am using Jennifer Janesko,which you can purchase here,do not use unless you have a license to do so.

Scrapkit is Pastellage by Angela of at Angela's Dreamz here and you can purchase it here. Gorgeous kit Angela,thank you!!

Font of choice,I am using Cumulus here.
-This tutorial was written assuming you have working knowledge of PSP-


Open frame 5/hit shiftD to duplicate/close orginal/resize frame 20%(make sure all layers is unchecked)/layers/new raster layer/flood fill white/right click on new layer/arrange/move down.

Click inside frame with your magicwand/selections/modify/expand by 6.
Paste paper 19 below frame layer/selections/invert/delete/do not deselect.

Image/resize all layers 20%.

Paste tube of choice/resize if needed/position/delete/deselect/dropshadow:

Vertical -2
Horizonal -2
Opacity 29
Blur 4

Repeat dropshadow:

Vertical 2
Horizonal 2
Opacity 29
Blur 4

Right click on frame layer/merge/merge down to paper layer/position/dropshadow of choice.

Paste element 15/resize 30%/position/same dropshadow.

Paste element 18 below merged layers/resize 30%/layers/duplicate 2 times/position.

Paste element 77/resize 50%/layers/duplicate/position/dropshadow.

Paste element 67(bow)/resize 60%/position/dropshadow:
Vertical 4
Horizonal 4
Opacity 46
Blur 5

Paste element 36/resize 50%/edit/repeat resize/layers/duplicate/position/dropshadow.

Paste second tube/position/dropshadow:

Vertical 5
Horizonal 5
Opacity 50
Blur 5

Delete white background layer/image/resize all layers 12%/layers/merge/merge visible.

Add copyrights.

Add name.

Save as png.
Hope you enjoyed my tut,would love to see your results and show it off in my gallery :)
Email me here
Hugs,Mary

Summer Whispers

Photobucket

Tube of choice,I am using PinUpToons,which you can purchase here,do not use unless you have a license to do so.

Scrapkit is Summer Whispers by Joy at Mystic Creations here and you can purchase it here. Stunning kit Joy,thank you!

Font of choice,I am using Brig Maven here.
-This tutorial was written assuming you have working knowledge of PSP-

Dropshadow for tut:
Vertical 5
Horizonal 5
Opacity 30
Blur 2

Open a new 600x700 white image.

Paste patterned frame as a new layer/resize 25%/image/resize all layers 15%.

Click inside frame using your magicwand/selections/modify/expand by 6.

Paste paper 13 below frame layer/resize 25%/edit/repeat resize/selections/invert/delete/do not deselect.

Paste doodle 1/position/delete/deselect.

Right click on frame layer/merge/merge down to paper layer/dropshadow.

Paste doodle 2 below merged layers/resize 20%/layers/duplicate 3 times/position around frame/right click on top doodle layer/merge/merge down to bottom doodle layer/dropshadow.

Paste flower 1/position to the top left of frame/layers/duplicate/image/mirror/image/flip/dropshadow to both layers.
Paste tube/position/dropshadow.

Paste bird bath/resize 40%/position/dropshadow.

Repeat with dahlia 2.

Paste puff bird 2/resize 55%/edit/repeat resize/position/dropshadow.

Paste birdhouse 1/resize 50%/position/dropshadow.

Paste small bow 1/resize 50%/edit/repeat resize/position/dropshadow.

Paste bird 1/resize 55%/edit/repeat resize/position/dropshadow.

Paste flower butterfly 2/resize 50%/edit/repeat resize/layers/duplicate/position/dropshadow.

Delete white background layer/image/resize all layers 12%/layers/merge/merge visible.

Add copyrights.

Add name.

Save as png.
Hope you enjoyed my tut,would love to see your results and show it off in my gallery :)

Email me here

Hugs,Mary

Sunday, June 13

Today's My Birthday

Photobucket
2 tube of choice,I am using Gennadiy Koufay,which you can purchase here,do not use unless you have a license to do so.

Scrapkit is Today's My Birthday by Chris at Katelynn's Designs here and you can purchase it here. I so love this kit,perfect for birthdays! Thank you Chris!

Font of choice,I am using Caprica here.
-This tutorial was written assuming you have working knowledge of PSP-

Open a new 700x600 white image.

Paste frame 1 as a new layer/click inside small frame on right bottom with your magicwand/selections/modify/expand by 5.

Activate paper 2_3/image/free rotate to the left 14 degrees(all layers)/paste below frame layer/position/selections/invert/delete/deselect.

Right click on top paper layer/merge/merge down to last paper layer.

Highlight and click inside large frame with your
magicwand/selections/modify/expand by 5.

Paste paper 1_3 below frame layer/selections/invert/delete/do not deselect.

Paste flowers 1_1/resize 30%/position/delete/repeat with flowers 2&3/dropshadow of choice/use for entire tut.

Hide white background layer/layers/merge/merge visible/dropshadow/unhide layer.

Paste doodle 1_3 below merged layers/resize 20%/positon with pick tool towards bottom left corner/layers/duplicate/image/mirror/image/flip.

Repeat with doodle 1_2 on opposite corners.

Paste card journal 1_1/resize 40%/selections/select all/float/defloat/paste tube/resize as needed/selections/invert/delete/right click on tube layer/properties/opacity/change to 60/right click on tube layer/merge/merge down to card layer/position/dropshadow.

Paste balloon 1_3/resize 30%/position/dropshadow/repeat with balloons 1&2.
Paste bow 1_3/resize 50%/edit/repeat resize/position/dropshadow.

Paste second tube/position/dropshadow if desired.

Paste butterfly 1_2/resize 50%/edit/repeat resize/layers/duplicate/position both layers/dropshadow.

Highlight white background layer/paste clown/resize 40%/duplicate 2 times/position/see my tag for reference.

Delete white background layer/image/resize all layers 25%/layers/merge/merge visible.

Add copyrights.

Add name.

Save as png.
Hope you enjoyed my tut,would love to see your results and show it off in my gallery :)
Email me here
Hugs,Mary

Princess

Photobucket

Tube of choice,I am using Shawli,which you can purchase here,do not use unless you have a license to do so.

Scrapkit is ChickaDoo by Rieneke at Rieneke Designs here and you can purchase it here. This kit is stunning,thank you Rieneke for letting me work with it :)

Script font of choice.
-This tutorial was written assuming you have working knowledge of PSP-

Dropshadow for tut:
Vertical 4
Horizonal 4
Opacity 35
Blur 5

Open a new 500x500 white image.

Paste frame 6 as a new layer/click inside frame with your magicwand/selections/modify/expand by 5.

Paste paper 6 below frame layer/resize 50%/selections/invert/delete/do not deselect.

Paste close up/resize as needed/position/delete/right click on close up layer/properties/opacity/change to 60/deselect/right click on frame layer/merge/merge down to paper layer/dropshadow.

Paste string 5 below merged layers/resize 50%/layers/dulicate 3 times/position all layers/dropshadow.

Paste string 4/resize 50%/layers/duplicate 1 time/position/dropshadow.
Paste bow 2/resize 50%/edit/repeat resize/position/dropshadow.

Paste dragonfly 2/resize 60%/edit/repeat resize/position/dropshadow.

Paste feltheart 2/resize 60%/position/dropshadow.

Paste ladybug 1/resize 70%/edit/repeat resize/layers/duplicate 2 times/position/dropshadow.

Paste pendant heart 1/resize 70%/edit/repeat resize/position/dropshadow.

Paste tube/resize if needed/position/dropshadow.

Paste princess wordart/resize 60%/edit/repeat resize/position/dropshadow.
Delete white background layer/layers/merge/merge visible.

Add copyrights.

Add name.

Save as png.
Hope you enjoyed my tut,would love to see your results and show it off in my gallery :)

Email me here

Hugs,Mary

Thursday, June 10

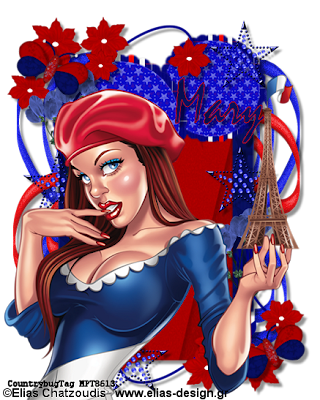
Paris Star


Tube or close up of choice,I am using Elias Chatzoudis,which you can purchase here,do not use unless you have a license to do so.

Scrapkit is American Sweetheart by Jay at Bello Scarto/Beautiful Scraps here and you can purchase it here.Thank you for letting me work with this gorgeous kit Jay!!

Template of choice,I am using template 111 by Missy at Divine Intentionz here.

Font of choice.
-This tutorial was written assuming you have working knowledge of PSP-

Open template/hit shiftD to duplicate/close orginal/delete credit layer.

Highlight and click on square layer with your magicwand/paste paper 6 into selections(edit)/deselect.

Repeat for following layers:

Rectangle-paper 4
Shape 1&2-paper 14
Circle 1&2-paper 13

Hide white background layer/layers/merge/merge visible/resize 15%/image/flip/image/mirror/dropshadow of choice(use for entire tut)/unhide white layer.

Paste element 1 below merged layers/layers/duplicate/position/dropshadow.
Repeat with element 3.

Paste element 4 /resize 30%/edit/repeat resize/layers/duplicate/position both layers/dropshadow.

Paste element 8/resize 40%/edit/repeat resize/layers/duplicate/position/dropshadow.

Paste element 16/resize 50%/edit/repeat resize/layers/duplicate 3 times/position/dropshadow.

Paste element 33/resize 50%/edit/repeat resize/layers/duplicate/position/dropshadow.

Delete white background layer/image/resize all layers 5%/layers/merge/merge visible.

Add copyrights.

Add name.

Save as png.
Hope you enjoyed my tut,would love to see your results and show it off in my gallery :)

Email me here

Hugs,Mary

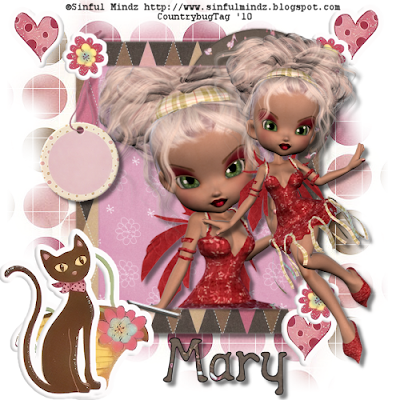
Pretty Pixie


Tube/image of choice,I am using Pixie Sienna by Leasa at Sinful Mindz here and you can purchase it here. She is gorgeous Leasa,thank you!

Scrapkit is Pretty Girl,a freebie by ZaZa at Scraps and Tubes here. Thank you for the awesome kit!

Template of choice,I am using template 114 by Missy at Divine Intentionz here.

Mask of choice.

Font of choice,I am using Apple Butter here.
-This tutorial was written assuming you have working knowledge of PSP-

Dropshadow of choice for tut.

Open template/hit shiftD to duplicate/close orginal/delete credit layer/image/canvas size/change to 500x500/highlight and flood fill background layer white.

Highlight and click on square layer with your magicwand/paste paper 3 into selections(edit)/deselect.

Highlight and click on circle layer with your magicwand/paste paper 4 into selections/deselect.

Highlight and click on square 2/paste paper 5 into selections/do not deselect.
Paste tube or pixie 1_5 as a new layer/resize as needed/position/selections/invert/delete/deselect/dropshadow.

Hide white background layer/layers/merge/merge visible/dropshadow/unhide layer.

Paste paper 1/apply mask/duplicate/position both layers.

Moving up top/paste bag/resize 20%/position/dropshadow if desired.

Repeat with cat.

Paste heart 3/resize 20%/layers/duplicate 2 times/position.

Repeat with flower.

Paste tag 1/resize 30%/edit/repeat resize/position/dropshadow.

Paste second tube/resize as needed/position/dropshadow.

Delete white background layer.

Layers/merge/merge visible.

Add copyrights.

Add name.

Save as png.
Hope you enjoyed my tut,would love to see your results and show it off in my gallery :)

Email me here

Hugs,Mary

Wednesday, June 9

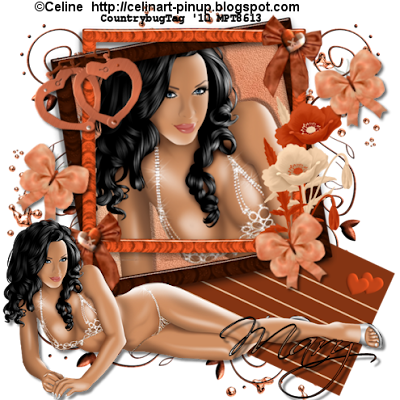
Burning Love


Tube&close up of choice,I am using Celine,which you can purchase here,do not use unless you have a license to do so.

Scrapkit is Burning Love by Lis at PSPgirl Place here and you can purchase it here. Gorgeous kit Lis,thank you!

Font of choice,I am using Scriptina Pro here.
-This tutorial was written assuming you have working knowledge of PSP-

Open a new 550x550 white image.

Paste element 34(frame) as a new layer/resize 30%/click inside frame with your magicwand/selections/modify/expand by 5.

Paste paper 3 below frame layer/selections/invert/delete/do not deselect.

Paste close up/position/delete/deselect/dropshadow:

Vertical -5
Horizonal -5
Opacity 36
Blur 3

Right click on frame layer/merge/merge down to paper layer/same dropshadow but 5 instead of -5/resize 10%/position.

Paste element 74 below merged layers/resize 50%/layers/duplicate 2 times/position.

Repeat with element 60.

Paste element 5(postcard)/position.

Paste element 12/resize 50%/edit/repeat resize/layers/duplicate/position both layers/dropshadow:

Vertical 3
Horizonal 3
Opacity 60
Blur 5

Repeat with element 3(button).

Paste element 53/resize 55%/position/same dropshadow.

Repeat with element 54.

Paste element 4/resize 55%/edit/repeat resize/position with the pick tool at an angle/using your selections tool/select a small portion of the chain/delete/position element/same dropshadow.

Paste tube/position/dropshadow:

Vertical 4
Horizonal 4
Opacity 50
Blur 4

Delete white background layer/image/resize all layers 10%/layers/merge/merge visible.

Add copyrights.

Add name.

Save as png.
Hope you enjoyed my tut,would love to see your results and show it off in my gallery :)
Email me here
Hugs,Mary

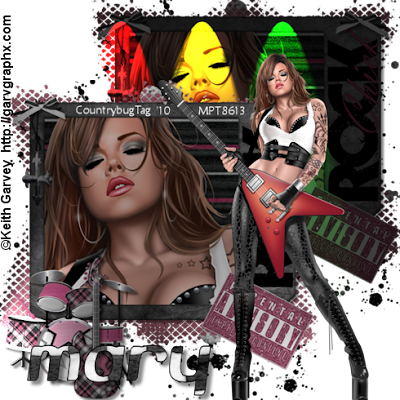
Rock Chick


Tube&close up of choice,I am using Keith Garvey,which you can purchase here,do not use unless you have a license to do so.

Scrapkit is Girls Rock by Amy at Ziggyfan Scraps here and you can purchase it here. This kit rocks,love it! Thank you Ziggy!!

Font of choice,I am using Beroga here.
-This tutorial was written assuming you have working knowledge of PSP-

Dropshadow for tut:
Vertical 5
Horizonal 5
Opacity 46
Blur 5

Open frame 1/image/canvas size,600x600/layers/new raster layer,leave transparent.

Click inside frame with your magicwand/selections/modify/expand by 6.

Paste paper 15 below frame layer/selections/invert/delete/do not deselect.
Paste close up/position/delete/deselect/dropshadow.

Right click on frame layer/merge/merge down to paper layer/dropshadow.

Paste glitter 1 below merged layers/resize 20%/position.

Repeat with glitter 2.

Paste element(pink glitter)/resize 50%/layers/duplicate 3 times/position around frame.

Paste drum/resize 50%/position/dropshadow.

Repeat with bass guitar.

Paste cross/resize 55%/positon/dropshadow.

Paste bow/resize 50%/edit/repeat resize/layers/duplicate/position both bows/dropshadow.

Paste sticker/resize 60%/position/dropshadow.

Hide transparent layer/layers/merge/merge visible/resize 20%/layers/duplicate/position/on bottom tag layer/effects/illumination effects/from dropdown menu,select traffic top/on top tag layer/effects/illumination effects/select factory default from the dropdown menu/position.

Paste tube/position/dropshadow/image/resize all layers 17%.

Layers/merge/merge visible.

Add copyrights.

Add name.

Save as png.
Hope you enjoyed my tut,would love to see your results and show it off in my gallery :)
Email me here
Hugs,Mary

Tuesday, June 8

Monday Blues


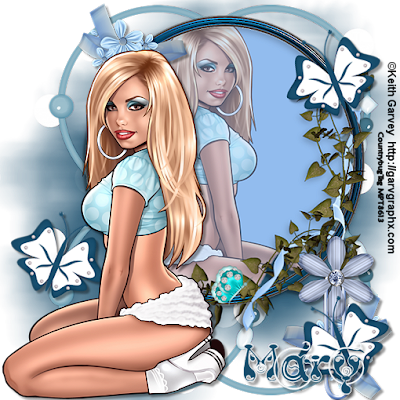
Tube of choice,I am using Keith Garvey,which you can purchase here,do not use unless you have a license to do so.


Scrapkit is Monday Blues by Sizzel at Sizzels Designs here and you can purchase it here. Gorgeous kit Sizzel,thank you!


Mask of choice.


Font of choice,I am using Kingthings Slipperylip here.


-This tutorial was written assuming you have working knowledge of PSP-


Open a new 600x600 white image/layers/new raster layer,leave transparent.


Paste frame as a new layer/resize 30%/click inside frame using your magicwand/make sure to get small areas thru flowers/selections/modify/expand by 6.


Paste paper 2 below frame layer/selections/invert/delete/do not deselect.


Paste tube/position/delete/deselect/right click on tube layer/properties/change opacity to 60.


Hide white and transparent layers/layers/merge/merge visible/apply dropshadow of choice(use this dropshadow for entire tut)/image/resize merged layers 10%/position.


Paste paper 6 below merged layers/apply mask/layers/duplicate/position both layers.


Paste double hoop/resize 35%/image/free rotate to the left 90 degrees/layers/duplicate/position both layers.


Moving up top/paste paste flower ribbon/resize 50%/edit/repeat resize/layers/duplicate/position both layers/dropshadow.
Paste clip/resize 50%/position/dropshadow.


Paste butterfly 1/resize 50%/edit/repeat resize/layers/duplicate 2 times/position all layers/dropshadow.


Paste tube/position/dropshadow.


Delete white background layer/image/resize all layers 15%.


Add copyrights.


Add name.


Save as png.


Hope you enjoyed my tut,would love to see your results and show it off in my gallery :)


Email me here


Hugs,Mary

Monday, June 7

Girls Like


Tube of choice,I am using Anna Marine,which you can purchase here,do not use unless you have a license to do so.


Scrapkit is Girls Like by Sanie at Creations By Sanie here and you can purchase it here. This kit is gorgeous,love everything in it! Thank you Sanie!


Font of choice,I am using Vianta here.


-This tutorial was written assuming you have working knowledge of PSP-


Dropshadow for tut:
Vertical -2
Horizonal -2
Opacity 25
Blur 3


Open a new 550x700 white image/layers/new raster layer,leave teansparent.


Paste element 26(frame)as a new layer/image/free rotate to the right 90 degrees.


Click inside frame with your magicwand/selections/modify/expand by 4.


Paste paper 12 below frame layer/selections/invert/delete/do not deselect.


Paste element 69(wire)/position/delete/do not deselect.


Paste tube/position/delete/deselect/apply dropshadow to tube&wire layers/hide transparent and white layers/layers/merge/merge visible/dropshadow/unhide layers.


Paste element 23 below merged layers/using your pick tool/position to the right of the frame/layers/duplicate/image/mirror/image/flip.


Repeat with element 39/positioning opposite of element 23.


Moving up top/paste element 3/resize 15%/position/dropshadow.


Paste element 16/resize 25%/position/dropshadow.


Paste element 6/resize 50%/position/dropshadow.


Paste element 74/resize 50%/edit/repeat resize/layers/duplicate 3 times/position/dropshadow to layers.


Paste element 42/resize 50%/edit/repeat resize/layers/duplicate 4 times/position/dropshadow to each layer.


Paste element 30/resize 30%/edit/repeat resize/position/dropshadow.


Delete white background layer/image/resize all layers 25%/layers/merge/merge visible.


Add copyrights.


Add name.


Layers/merge/merge visible.


Save as png.


Hope you enjoyed my tut,would love to see your results and show it off in my gallery :)


Email me here


Hugs,Mary

Sunday, June 6

Wedding Jitters


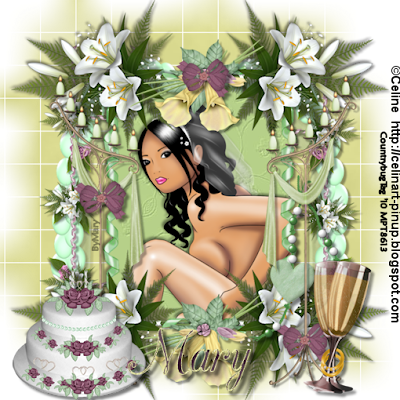
Tube of choice,I am using Celine,which you can purchase here,do not use unless you have a license to do so.


Scrapkit is Wedding Jitters by Crystal at Crystal Cottage Scraps here and you can purchase it here. With wedding season here,this kit is perfect for them all!! Thank you Crys!


Mask of choice.


Font of choice,I am using CAC Champagne here.


-This tutorial was written assuming you have working knowledge of PSP-


Open a new 600x600 white image/layers/new raster layer.


Paste frame 2 as a new layer/resize 25%/click inside frame with your magicwand/selections/modify/expand by 3/paste paper 2 below frame layer/selections/invert/delete/do not deselect.


Paste your tube/position/delete/deselect/dropshadow:

Vertical -3
Horizonal -3
Opacity 46
Blur 5


Right click on frame layer/merge/merge down to paper layer/same dropshadow/then apply dropshadow as:

Vertical 3
Opacity 3
Opacity 46
Blur 5


Paste paper 14 below merged layers/apply mask of choice.


Paste arch 2 /resize 15%/layers/duplicate/position on each side of frame/dropshadow:

Vertical 4
Horizonal 4
Opacity 35
Blur 3


Paste double flower ribbon frame 1/resize 50%/layers/duplicate/position as arch/same dropshadow.


Paste bouqet/resize 60%/layers/duplicate/position/same dropshadow.


Paste candlestand 2/resize 20%/same dropshadow.


Paste cake 2/resize 60%/position/dropshadow:

Vertical 5
Horizonal 5
Opacity 50
Blur 5


Paste heart rope 2/resize 50%/position/same dropshadow.


Paste flower bow 1/resize 60%/edit/repeat resize/layers/duplicate 2 times/position all layers/same dropshadow.


Paste wine glasses 1/resize 60%/position/same dropshadow.


Delete white background layer/image/resize all layers by 15%/layers/merge/merge visible.


Add copyrights.


Add name.
(For my name,I used paper 8&11)


Save as png.


Hope you enjoyed my tut,would love to see your results and show it off in my gallery :)


Email me here


Hugs,Mary

  © Blogger template Customization and Installation by Krissy's Scraps and Imaging 2011

Back to TOP